Showing posts with label Dessert. Show all posts

December 30, 2013

Best Chocolate Chip Cookies

 
These are no regular chocolate chip cookies. Can we talk about browned butter? Salt on top? Extra vanilla extract?
 
Yes, yes we can.
 
 
I suggest making these cookies extra big, and under baking them so they're especially soft. They'll be chewy and positively luscious, while still having that conmpletely addicting crisp outer edge.
 
Adding a sprinkling of kosher salt on top before baking is insanely good.
 
You'll never want to bake cookies without salt on top again.
 
 
We had to hide these cookies in a cabinet so that they wouldn't all get eaten immediately... And once they were out on the table they lasted all of about a minute.
 
Feel free to eat while warm with ice cream on top! Happy New Year!
 

Best Chocolate Chip Cookes (with salt!)
Ingredients:
1¾ cups unbleached all-purpose flour
½ teaspoon baking soda
14 tablespoons unsalted butter, divided
¾ cup dark brown sugar
½ cup granulated sugar
1 teaspoon salt
2 teaspoons vanilla extract
1 egg
1 egg yolk
1¼ cups semisweet chocolate chips
2 T. kosher or other large flake salt

Directions:
Preheat oven to 375 degrees. Line 2 large baking pans with parchment paper and set aside.
In a medium bowl whisk together flour and baking soda. Set aside.
Heat 10 T. of the butter in a skillet over medium high heat, swirling constantly until the butter is dark brown and has a nutty smell. Remove the skillet from heat and pour the butter into a heatproof bowl. Stir the remaining 4 T. butter into the hot butter until melted. Cool to room temperature. Add both sugars, egg, egg yolk, and vanilla and whisk until there are no lumps. Let stand for 3 minutes then stir for 30 and repeat this twice. Then stir in the flour mixture until just combined, then stir in the chocolate chips.
Use an ice cream scoop or big spoon to divide the dough into about 16 big cookies, 2 inches apart on the cookie sheets. Sprinkle and gently press the salt onto the tops of each of the cookies evenly.
Bake 8-10 minutes each, rotating halfway through. Cook on the sheets 5-10 minutes before transferring to a wire rack to cool completely.

October 22, 2013

Night Market Challenge: Peanut Butter Bacon Cannoli Cupcakes


What happens when you're out with a fellow dessert-loving blogger and you eat a sweet treat that just doesn't deliver? You go home and remake it, but better!

Blogger buddy Alyssa of Suitcases and Sweets and I were out trolling the Food Trust's Night Market, our favorite, and by far most gluttonous, activity together. It's blocks and blocks of diverse food truck offering a wide range of unique comforts. The scene is hopping and the demand (ahem, lines) can be intense. 


We are strategic in what we select to eat. 
We divide and conquer.
We share like siblings. 
And we critique like a nightmare.
 

After trolling hard-core and assessing our options, we committed to the most interesting savory foods and, as stated above, tasted, indulged, commented, considered strengths and weaknesses, and carried on.


Then came time for a sweet bite. Cupcake trucks? Meh. Alyssa bakes a mean cupcake and it wouldn't have been fair. Avante garde chocolates? Sigh. Mini key-lime pies? Sold out.

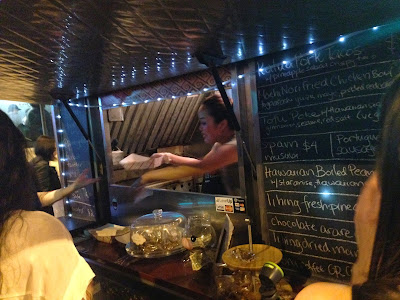
My eyes settled upon a distant chalkboard. Down at the bottom was scribbled a sugary offering of interest: bacon peanut butter cannolis. Now that was new! Bacon? Peanut Butter? In a cannoli? We were mildly concerned, maybe even a little scared, but we threw inhibition into the wind.


And it didn't deliver! The flavors were muted, the peanut butter was meek, the bacon was bland... the cannoli shell delivered, but hey, there had to be a saving grace to the thing! Sad and disappointed, we vowed to recreate those crazy flavors but better. 

Hello!


These cupcakes are full of bright, bold flavors -- a moist, fluffy cannoli flavored cupcake is filled with thick chocolate bacon ganache and then topped with a creamy peanut butter cream cheese frosting. 

It's a nutty flavor combination that combines the absolute best of sweet and savory. Bacon? Peanut Butter? Cream Cheese? Chocolate? Vanilla and Almond? 

All are front and center in this delightful remake of the Night Market original. I'm so glad that Alyssa and I were able to collaborate on something new and improved! And the best part about it was the lack of food truck to sell these out of... which meant we had every last crumb for ourselves (and a few lucky friends)!

Peanut Butter Cannoli Cupcakes: makes 24
Ingredients:
For the cake:
2 1/2 cups flour
1 teaspoon salt
1 tablespoon baking powder
2 cups sugar
8 ounces (2 sticks) unsalted butter, room temperature
4 eggs, room temperature
1 teaspoon vanilla extract
1/2 teaspoon almond extract
1 cup milk

For the Filling:
4 ounces semisweet chocolate morsels
1/3 cup heavy cream
1 tablespoon butter, room temperature
3 strips crispy bacon, crumbled

For the Frosting
8 ounces cream cheese
4 ounces (1 stick) unsalted butter, room temperature
1 cup peanut butter
1 teaspoon vanilla extract
2 cups powdered sugar
1 strip crispy bacon for garnish, optional

Directions:
Cake:
Preheat oven to 350 degrees and line cupcake trays with 24 liners. Combine flour, baking powder, and salt in bowl and set aside. With an electric or standing mixer, cream the sugar and butter on medium speed until light and fluffy. Add eggs, one at a time, scraping after each addition. Add vanilla and almond extracts. On low speed, add the flour mixture and milk in alternating parts, beginning and ending with dry ingredients. Mix until smooth.

Fill each cupcake liner about 3/4 full with batter. Bake about 15 minutes or until golden and a toothpick comes out clean. Cool in the pan on a wire rack about 5 minutes, then remove onto the wire rack to cool completely. Meantime, make the ganache and frosting, below.

Chocolate-Bacon Ganache Filling:
Pour chocolate chips into a medium bowl. In a small pot on the stove, add the cream and butter and heat until just simmering (do not boil). Pour cream mixture over the chocolate and stir until smooth.Add the 3 strips of crumbled bacon.

Peanut Butter Cream Cheese Frosting: 
With an electric mixer beat together the butter, cream cheese, and peanut butter on medium speed until light and fluffy. Add vanilla and powdered sugar and beat until smooth. Switch stand mixer to high and beat for another 2-3 minutes until fluffy.

Assembly:
Use an apple corer to remove the center of each cupcake, then spoon or pipe the ganache into the holes to fill. Use a piping bag to pipe the frosting onto each cupcake, then top with a small crumble of crispy bacon. Serve, or refrigerate the extras (there won't be any!).


September 8, 2013

Celebration Cake: S + P Get Engaged


I'm ecstatic for my friends Sarah and Patrick, because they've just gotten engaged! It's a cause for celebration, colorful cake, and sprinkles on top!

When Patrick tipped Sarah's friends off that he was planning to propose and wanted to gather in celebration afterward, my first question was, "what can I do to help get this shindig off the ground, please?" I couldn't have been more pleased when his initial response of "nothing" was changed a few hours later to, "actually, how about a cake? for 30?"

Celebration challenge accepted. Let's go.


I hemmed and hawed over how to best feed a crowd. I'm used to baking round layer cakes, but ultimately (after much paralysis and an emergency phone call to my resident baker friend/blogger Alyssa in the baking aisle of Walmart) decided on a 4-layer, 9 x 13 inch cake.

Later, I got to work doubling the already big recipe for fail-proof vanilla cake. When I got done with the butter and sugar creaming steps I realized there was no way I'd fit the rest of the ingredients in my standing mixer.

A 53 second crisis emerged. I looked around my kitchen, scouring for a solution. Crapppp, I always do stuff like this!

My eyes landed on my enormous lobster pot-slash-wedding registry item I thought I couldn't live without but really won't have use for until I maybe have 10 children to boil pasta for.... except for now.

When it's time to call in the big guns.


Hee hee. That standing mixer bowl looks like a dwarf. 

Okay, so after mixing the batter I divided it up into about 7 cups each in two bowls. Sarah and Patrick met at the University of Delaware, colors blue and yellow. I also wanted a way to party-up this traditional white on white bridal style cake, so boom, let's go throwback to kindergarten finger painting time and mix it up with primary colors.


Pour each bowl into a separate pan, smooth out and bang on the counter to release those pesky air bubbles. 


Then bake. 

This is the ultimate surprise party cake, because the cake itself is hiding its own party surprise. Creamy white on the outside, quiet, unassuming.... suggesting nothing but the norm inside.... Then wham! Layers of color! 


There are a bunch of pictures missing of... how burned this cake was on the very outer parts. I admit it, I'm not going to pretend I baked this flawless, picture perfect thing. Through much stress, wondering how the heck I could have burned the cake, wondering whether I would have to start again, I was ultimately able to rescue this cake. 

It involved shaving off lots of sad, completely overdone pieces. My garbage was quite full. It also involved brushing the cake with a delightful mix of vanilla, sugar, and water, which addressed my fear that the cake I saved would be somehow overdone. Which I don't think it was. It was just a weird situation where for the first time ever the outer parts of the cake got incinerated. 

Well, it wouldn't be a party without someone hitting their head on the ceiling fan while dancing on the table, would it? 


After an entire day and night in my kitchen, the time was nearing 11 PM and I hit a wall. I simply could not bring myself to color more frosting to pipe a message on top of the cake. 

For the millionth time that day, I looked around my kitchen for an escape to the corner I'd backed myself into.
Sprinkles.

I used the squared off end of a fondue skewer to carve a path of S + P into the frosting (this way, if I messed it up I could simply smooth it out and trace the initials again.) I then used a tiny spoon to carefully fill the message with colorful sprinkles. Fun!

You could use any sort of sparkly, sugar, or chocolate sprinkles for this. 

It's your party, you can do what you want to. 


After all was said and done, the cake weighed as much as a third grader.

Sarah was surprised twice in one weekend, a party was had, dessert was a hit, and love was all around.

Congrats Sarah and Patrick!


Celebration Cake: makes one 9 x 13 inch four layer cake
1, 2, 3, 4 Cake:
Note: to make two 9x13 inch panfulls, you must make this recipe twice in two batches.

1 cup (2 sticks) butter, room temp
2 cups granulated sugar
4 eggs
3 cups sifted self-rising flour
1 cup milk
1 t. pure vanilla extract
food coloring of choice

Prepare 9x13 pan with nonstick spray and dust with flour. Preheat oven to 325. In an electric mixer, cream butter until fluffy, then add the sugar and continue to cream for about 8 minutes. Add eggs one at a time, beating well after each addition. Add flour and milk alternately, beginning and ending with the flour. Add vanilla and beat until just incorporated. Color with food coloring as desired. You can either use one mix for a smaller cake and divide into two colors, or use one color for this batch. Mix well but don't beat or the batter will become tough.

Pour into prepared pan and drop several times on the counter to release air bubbles. Bake 25-30 minutes or until the center is set. Cool in the pan 10 minutes before releasing gently onto a cooling rack. Flash freeze 1 hour in the freezer once its completely cooled, as cake is easier to work with when firm.

Meanwhile prepare frosting:

Thick Buttercream Frosting: I quadrupled this recipe for my 4-layer 9 x 13 inch cake.
1 cup (2 sticks) butter, room temperature
3-4 cups confectioner sugar
1-2 T. pure vanilla extract
1 T. milk

Cream the butter, then turn the mixer on low add in the sugar one cup at a time. Once the sugar is all barely incorporated, add the vanilla and milk and turn the mixer on high and beat until fluffy and smooth.

Cake assembly: Once my two sheet cakes were frozen, I sliced the tops horizontally to make them flat (its ok if they aren't perfect, I simply stack up thinner sides with thicker sides of the next layer when stacking and it all events out), and stacked the cakes on top of each other and trimmed the sides so the sizes matched.

I then carefully sliced horizontally through the center of each cake to produce 4 separate layers: two yellow, two blue.

I added a dollop of frosting to the bottom of my cake base, then placed my thickest layer, a yellow one, on the bottom. I smoothed out about 1.5 cups of frosting on this layer, then put a blue layer on top, repeating this process until I ended with a blue layer on top. I then coated the entire cake in a thin layer of frosting, the crumb layer, and set in the fridge to stiffen.

A couple hours later, I frosted the entire cake again to ensure a smooth and level outside with no crumbs. I decorated it and put it back in the fridge until ready to eat!

May 22, 2013

Chocolate, Nut & Fruit Oatmeal-Coconut Cookies


These cookies are soft, chewy, and very, very addicting. It's like trail mix exploded into an oatmeal cookie... with a toasty hint of coconut that takes everything over the top.

My mom visited Philly for a belated Mother's Day weekend. I had planned a picnic in Rittenhouse Square Park and the menu included fresh baguettes, a variety of meats, cheeses,and spreads, fresh and dried fruits, people-watching, and for dessert: mom's favorite flavors. Mom adores coconut, oatmeal, chocolate, cranberries, and almonds. I knew they could all roll into one cookie, so that's exactly what we baked.

Unfortunately, the weather wasn't on our side so we had to have our picnic indoors. But we did get to sneak a bunch of these giant treats fresh out of the oven as an appetizer, and then indulge again for dessert.... and snack later... and a little for breakfast the next morning.

Hey! Cookies are versatile, and with ingredients this hearty and delicious, I say it's fair game for putting a smile on at any time of the day.

P.S. - This is another great recipe for playing with flavors... how about pecans instead of almonds? dried cherries or hunks of apricots instead of dried cranberries? chopped dark chocolate with sea salt subbed for the chocolate chips? go wild!


Chocolate, Nut & Fruit Oatmeal Coconut Cookies: makes about 14-16 large cookies
Ingredients:
1 stick butter, room temperature
1/2 cup slivered almonds, toasted and cooled
1/2 cup packed brown sugar
3 tablespoons granulated sugar
1 large egg
3/4 teaspoon vanilla
1/4 teaspoon baking soda
1/8 teaspoon salt
1/4 teaspoon ground cinnamon
1/2 cup flour
1 1/8 cups old-fashioned oats
heaping 3/4 cup shredded unsweetened coconut
1/2 cup dried cranberries
1 cup semi-sweet chocolate morsels

Directions:
Preheat oven to 375 degrees. Toast almonds on a baking sheet, stirring and watching carefully, and cool. 

Beat together the butter and both sugars at high speed until fluffy. Add the egg and beat until just blended, then beat in the vanilla, baking soda, salt, and cinnamon. Add the flour and mix at low speed until just blended. Stir in the oats, coconut, almonds, cranberries and chocolate (do not over-stir). On parchment paper or non-stick baking mat on a cookie sheet, scoop about 1/4 cup mounds of cookie and gently roll into a ball. Press down lightly to form a flattened circle about 1/2 inch thick on the sheet. Continue this, placing cookies about 2 inches apart. 

Bake for 12-15 minutes total, rotating the pans on each rack and from front to back half-way through. Remove cookies and cool 10 minutes on the baking sheet then transfer on a wire rack to cool completely. Serve or store in an airtight container. 


April 14, 2013

Cranberry-Peach Crumble Tart with Shortbread Crust


Feast your eyes.


Yep, that's one tasty tart! This tart is perfection: Shortbread cookie crust on the bottom, gooey pie filling in the middle, then topped with a crisp brown-sugar cinnamon oat crumb topping. Stop the madness! Stop the goodness!

The idea for this tart was actually born out of my laziness. My mother asked me to bake dessert to feed a crowd on Easter. The added challenge was that I would be traveling with whatever I baked... by train from Philly to Connecticut with my dog and luggage for a week-long trip to Puerto Rico afterward. 

I needed to bake something big and crowd pleasing, easy (I'd be baking on a weeknight), but that would also be solid enough to travel well. A huge cake and pies were out of the question. Dessert bars fit the bill but they didn't seem fancy enough for Easter dessert. It dawned on me: why not make a dessert-bar type of dessert, but in a big, beautiful tart form?

Flavor wise, I wanted rich and satisfying (this is dessert, after all), but nothing too heavy after our large holiday meal (decadent chocolate desserts just didn't seem right for the occasion). I wanted a fruit-filled-something that would highlight the bright flavors of Spring. A bar-type tart with fruit filling. This warranted a shortbread crust and crumble topping. Done and done!

It worked out perfectly, was loved by all, and I would definitely make it again in a heartbeat. It would be fun to play around with fruit fillings -- apple, cherry, blueberry.... Mmmmm! For a more traditional fruit-bar dessert, you could even pour in preserves/jam as the fruit filling. Sheesh, this post is making my mouth water!


Cranberry-Peach Crumble Tart with Shortbread Crust: makes two 9" round tarts
You will need two 9" springform pans

First, make and bake your shortbread crust:
1 cup white sugar
1 teaspoon baking powder
3 cups flour
1/4 teaspoon cinnamon
1/8 teaspoon nutmeg
1/4 teaspoon salt
1 cup cold unsalted butter, diced
1 large egg

Preheat the oven to 375°F. Spray springform pans with non-stick spray. In a medium bowl, stir together sugar, baking powder, flour, salt and spices with a whisk. Use a pastry blender, fork or your fingertips, blend the diced butter and egg into the flour mixture. It will be crumbly. Pat half of the crumbs into the bottom of each springform pan, pressing firmly. Bake in the oven about 15 minutes or until lightly golden, then cool before filling.

Meanwhile, make your fruit filling:
4 cans Light Peaches (in water or light juice)
1 cup fresh cranberries
1 1/4 cup sugar
2 T. honey
1/4 cup cornstarch

Drain the cans of peaches, reserving one can's worth of juice. Dice the peaches into large pieces. Add the juice of one can to a saucepan and add the sugar and cornstarch and stir. Bring to a boil and cook, stirring, two minutes or until thickened. Add the peaches, cranberries, and honey. Stir to combine. Once it is thick (adding the fruit may have created additional water), turn off heat.

Then.... assemble that delicious oat topping:
1 cup flour
1 cup quick-cooking rolled oats
2/3 cup packed brown sugar
1/2 teaspoon cinnamon
1/4 teaspoon baking soda
1/2 cup cold butter, diced

Combine the flour, oats, brown sugar, cinnamon, and baking soda. Add in the butter and use your hands to create a crumble. Set aside.

Pour half of the fruit filling onto each of the shortbread crusts and spread evenly to the sides. Top each crumble with half of the oat topping. Bake at 375 for about 30 minutes or until the top is golden and the fruit is bubbling. Cool completely before serving with fresh whipped cream or vanilla ice cream!

March 6, 2013

Feel-Good Carrot Cake with Cinnamon-Pecan Frosting for One


It was exactly what I needed on this terrible, horrible, no-good, very-bad, day.  

Oh, and it was ready in just minutes! And I made it in the microwave! Best yet, it was actually healthy... because who needs more guilt or upset on a no-good-bad day? On the emotional side, I contemplated stopping by the bake shop on my way home from work, promptly changing into my PJ's, and gorging on sweets on the couch. But the rational side of me thought this idea through... I realized a sugar binge would make me feel even more yucky. 

Sometimes being an addictions counselor is just plain tough!

I only needed good feelings, delicious indulgence, and the comfort that could only be provided by layer cake.  But how? I Googled around, and ultimately adapted an already healthy and fast carrot cake recipe into this recipe below. 


I included everything I love about carrot cake: the sweetness of carrots and brown sugar, the tropical tang of pineapple, the hint of coconut... and obviously the best part: thick cinnamon-pecan cream cheese frosting! 

I'm sitting down to my personalized plate of layered carrot cake now, and I'm thinking about how my day just got so much better. No guilt, emotional spikes, or regret in sight. I can leave all of that at the office., thank you! Tonight's dessert experience is pajama attire only. 

Feel-Good Carrot Cake for One
Ingredients:
2 T. white whole wheat flour
2 T. white flour
1/2 t. cinnamon
1/4 t. pumpkin pie spice
1/8 t. salt
1/8 t. baking soda
1/4 t. baking powder
1 packet stevia or Truvia
1.5 T. dark brown sugar
1 T. vegetable oil
carrots and pineapple, food processed into 1/3 cup worth
(I used baby carrots I had on hand, and frozen pineapple chunks)
1 T. shredded coconut
1 T. milk
1/4 t. vanilla extract
1 egg white, lightly beaten

Directions:
In a small bowl combine all dry ingredients through dark brown sugar. In a medium bowl, add all wet ingredients through egg white and stir to combine thoroughly. Add the dry ingredients to the wet and stir to barely combine (do not overmix). Spray two small ramekins (one is fine, too!) with cooking spray and evenly divide the batter between them. Microwave on high for about 3 minutes, using less or more time depending on your microwave wattage, until the cakes are firm. Remove and allow to cool before gently prying out of the ramekins. Frost with frosting below, and eat immediately!!

Cinnamon-Pecan Frosting:
1.5 t. Truvia or more to taste
1/3 cup 2% or whole-fat Fage greek yogurt
1 T. cream cheese, room temp
a couple drops vanilla extract
pinch cinnamon
1 T. chopped pecans

Directions: Beat together the Truvia and Greek yogurt, then beat in the cream cheese and vanilla extract. Stir in the cinnamon and pecans and slather on your cake!


February 17, 2013

Chocolate-Mint Bread: A Healthy Answer to Thin-Mint Cravings


This year for Valentine's Day, Matt was on call at the hospital. This meant that when he quietly crept out of the house in the dark, early hours of Valentine's morning, I wouldn't see him again until two days later. Of course I wanted to leave him a treat that would make him think of me during his long, exhausting, and hunger-inducing shift.... A snack that would be like a giant Valentine's hug to both the stomach and heart.

Cue these delightfully moist, rich chocolate-mint breads. I baked them in small heart-shaped spring-form pans that I use for all love-related baking. The batter an easily be used in any size from cupcake to loaf. In fact, I used some left over batter to pop out a few cupcake sized breads that I ate warm out of the oven. I needed to taste test and make sure that they were as delicious as I hoped they would be!


You might be thinking, "chocolate-mint bread? You mean cake, right?" Nope. Bread it is. It's got the perfect hint of sweetness from a touch of sugar, as well as chocolate chips folded into the batter, but otherwise this bread is wonderfully spongy and dense like any other breakfast loaf... Oh, and I've been withholding the best part. It's healthy. 

What? I don't want to contribute to fatigue, weight gain, or clogged arteries in my husband? Surprise! Let's feed the man a snack he can really dig into and never know it's made without any fats from oil or butter.

Chocolate and mint are one of M's favorite flavor combinations. This bread is spot on. The chocolate flavor pervades, while the little bit of peppermint extract hits the right cooling note there at the end. Every bite is filled with the flavor of classic Thin Mint cookies, just in a soft, super-comforting texture.

And isn't that what love is? Comforting, cool, sweet, delicious, and good for you.


Chocolate-Mint Bread
Ingredients:
1 cup plain unsweetened Greek yogurt
1/2 cup granulated sugar
2 eggs
1 T. pure vanilla extract
1/4 t. peppermint extract
1/4 cup milk (I used 2%)
1/2 cup white whole-wheat flour
1/2 cup minus 2 T. white flour
2 T. cornstarch
1/2 cup unsweetened cocoa powder, plus extra for dusting pan
2 t. baking powder
1/2 t. baking soda
1/2 t. salt
1/4 to 1/3 cup each of semi-sweet and dark chocolate chips

Directions: Preheat oven to 350 degrees. Spray or wipe pan of choice with cooking spray, then dust with cocoa powder. In a medium bowl stir together the Greek yogurt, sugar, eggs, vanilla and peppermint, and milk. Combine thoroughly. In a large bowl combine white-wheat flour, white flour, cornstarch, cocoa powder, baking powder, baking soda, and salt. Make sure they are blended completely, then make a well in the dry ingredients and pour in the wet. Stir to combine, making sure not to over-mix. Gently fold in the semi-sweet and dark chocolate chips.

Pour into the pan and even out the top with a spatula, then drop the pan on the counter from about 6" high a few times to release air bubbles. Bake 20-25 minutes for cupcakes or mini-loaf pan, and 45-50 minutes for a large loaf. Cool 10 minutes on wire rack in the pan, then release from the sides with a knife and cool completely on a wire rack. Wrap tightly in plastic wrap to store.

January 6, 2013

New York Black & White Cookies


Until I met my husband, black and white cookies had never appealed to me. I'm not sure why it took a Chicago guy and his family to endear this New York area girl to black & whites, but that's how it went.

And now I'm into the chewy, cake-like cookie with the delightfully toothsome, split-personality coating of sweet sugar and deep cocoa.

This Christmas, my husband baked them as part of our Christmas cookie tradition with my grandmother. They turned out perfectly. Large, soft, golden... with beautiful, firm frosting. Eating one is like an instant transplant to the streets of New York, and they're just as stunning and delicious as that city itself.


New York City Black & Whites

Ingredients
For Cookies:
1 1/4 cups all-purpose flour
1/2 teaspoon baking soda
1/2 teaspoon salt
1/3 cup buttermilk
1/2 teaspoon vanilla
1/3 cup unsalted butter, softened
1/2 cup sugar
1 large eggs

For Black or White icing
1 1/2 cups icing sugar or 1 1/2 cups confectioners' sugar
1 tablespoon clear corn syrup
2 teaspoons lemon juice
1/4 teaspoon vanilla
1 tablespoon water ( approx)
1/4 cup cocoa powder + more to darken as needed

Directions
Preheat oven to 350°F.
Sift together flour, baking soda and salt in medium bowl. In small bowl or cup, mix together buttermilk and vanilla.

Beat butter and white sugar together in a large mixing bowl with an electric mixer for about 3 minutes or until it's evenly distributed. Add egg to butter and sugar mixture, and beat until blended.

Gradually beat in flour mixture one cup at a time, and add in buttermilk mixture between each cup of flour, and mix until smooth. Scrape down the sides of the bowl while mixing.

Spoon batter in 1/4 cup size servings onto a baking sheet lined with parchment paper. Bake on middle rack for about 15-17 minutes, or until the tops are golden brown and spring back when touched. Place on a cooling rack, and allow to cool completely before icing.

Stir together icing sugar, corn syrup, lemon juice, vanilla, and 1/2 Tbsp of water in bowl until smooth.
Place half of mixture into separate bowl and add cocoa powder, and remaining water bit by bit until it is the same consistency as the white icing. Add more icing sugar to thicken, until it is smooth and spreadable.
Turn cooled cookies flat side up, and spread icing with pastry spatula or butter knife, putting white over one half and chocolate over the other. Allow the icing to firm up before storing in an airtight container or wrapping individually in plastic wrap.

December 30, 2012

Peanut Butter Lover's Sandwich Cookies


... Soft, scrumptious, and absolutely overloaded with major peanut butter flavor. 


Every year, since I was able to hold a spoon, I've baked cookies at Christmastime with my grandmother. And ever since I could eat solid food  have been obsessed with peanut butter. So while my other cousins help grandma craft beautiful and traditional Christmas cookies for the hundreds of cookie plates she gives away to neighbors and friends, I have always baked some indulgent version of a peanut butter cookie that doesn't make it onto the plate... because we want to keep it to eat for ourselves. 

These may have been the most over the top. 


The cookie itself is amazing -- it's perfectly soft, chewy, and super nutty. Then, the creamy, salty, sweet peanut butter frosting is what takes this dessert to another level. If you love peanut butter as much as I do (and as much as my entire family does, as these did not last very long), don't wait to make these. They're fun to make and eat, and will bring smiles far into the New Year. 

Peanut Butter Lover's Sandwich Cookies: makes about 24 sandwich cookies
Cookie Ingredients:
2 cups all-purpose flour
2 teaspoons baking soda
½ teaspoon salt
1 cup unsalted butter, softened
1 cup peanut butter (creamy Skippy preferred)
1 cup sugar
2/3 cup packed brown sugar
2 eggs
1/2 teaspoon pure vanilla
1.2 cup rolled oats
1/2 cup chopped peanuts
1 cup peanut butter chips

Cookie Directions:
Stir together the flour, baking soda, and salt and set aside. With electric mixer set to medium speed, beat the butter, peanut butter, and white and brown sugars until very fluffy. Beat in each egg one at a time, then the vanilla. Slowly add the flour mixture until just combined, then gently stir in the oats, peanuts, and peanut butter chips. 

Preheat the oven to 350 degrees. Refrigerate the dough 15 minutes, then roll 1" balls and place two inches apart on a baking sheet lined with parchment. Bake about 10 minutes or until barely browned around the edges. Cool on the cookie sheet 5 minutes, then carefully remove to cooling rack. Cool completely, and meanwhile make your frosting. 

Frosting Ingredients:
1/2 pound (2 sticks) butter, at room temperature
1 cup creamy peanut butter, preferably Skippy
3.5 cups confectioners’ sugar.
*Beat all ingredients together until well combined

Cookie Assembly: Using a piping bag, or a spoon, turn one cookie upside down and fill to about .5" to the edge of the cookie with frosting, then gently press another cookie on top. Repeat until all cookies are assembled into sandwiches. 

December 9, 2012

Lemon-Filled Layer Cake with Cream Cheese Frosting


Don't you want my creamy, luscious layers? 


There are so many dimensions of flavor and texture in this cake. It's addicting. 

The plentiful filling of lemon curd is both sugary sweet and mouth-puckeringly-tart. 
It's slathered on top of dense layers of seriously rich, moist white cake (think pound-cake consistency)
then the whole cake is enveloped in thick, tangy cream-cheese frosting. 

I swear it's the perfect combination of cake, filling, and frosting. I'm a little obsessed now.
I baked this cake for my sister's baby shower and it was a real hit. 
Even non-lemon lovers admitted they got converted. 


The cakes were pretty huge, which was perfect to feed a crowd. 
I've been craving it ever since I finished off the last tall, huge leftover piece. 

The best part is that a lot of the cake can be made in advance. 
I made vats of lemon curd and froze it weeks earlier. 
The cake layers and cream cheese frosting were made and the whole cake assembled the day before. 
A seriously impressive cake got seriously simplified!

Now I'm just thinking of an occasion to make this for again soon...
Usually I'm a carrot cake or chocolate-fudge cake type of gal, but let's face it, 
right now I'm totally a sucker for lemon. 


Lemon Layer Cake with Cream Cheese Frosting: makes one 4-layer cake
Lemon Curd: (recipe from Ina Garten)
Ingredients:
3 lemons

  • 1 1/2 cups sugar
  • 4 extra-large eggs
  • 1/2 cup lemon juice (from 3 to 4 lemons)
  • 1/8 teaspoon kosher salt

Directions:
  • 8 ounces unsalted butter, softened
  • 8 ounces cream cheese, softened
  • 4 cups powdered sugar
  • 2 teaspoons vanilla extract
Directions:
Using a carrot peeler, peel off the yellow zest of each lemon. Put the zest in a food processor fitted with the steel blade. Add the sugar and pulse until the zest is very finely minced into the sugar.
In a separate bowl, cream the butter, then beat in the sugar and lemon mixture. Add the eggs, 1 at a time, and then add the lemon juice and salt. Mix until combined.
Pour the mixture into a 2 quart saucepan and cook over low heat until thickened (about 10 minutes), stirring constantly. It should be cooking at just below a simmer. Remove from heat and cool completely. It is easiest to work with the curd in the cake layers when it is chilled out of the refrigerator. 

White Cake: from Smitten Kitchen's 1-2-3-4 Cake. Failproof as far as cakes go!
Ingredients: 
1 cup (2 sticks) butter, at room temperature

2 cups sugar

4 eggs, room temperature

3 cups sifted self-rising flour*
1 cup milk, room temperature
1 teaspoon pure vanilla extract


2 8"-9" cake pans, oiled and dusted with flour 

Directions: 
Preheat oven to 350°F. Using an electric mixer, cream butter until fluffy. Add sugar and continue to cream well for 6 to 8 minutes. Add eggs 1 at a time, beating well after each addition. Add flour and milk alternately to creamed mixture, beginning and ending with flour. Add vanilla and continue to beat until just mixed. Divide batter equally among prepared pans. Drop each cake pan flat against the counter a few times to release any air bubbles.

Bake for 25 to 30 minutes or until a tester or toothpick inserted into the center comes out clean. Remove and cool in pan 10 minutes, then carefully invert onto a wire rack for complete cooling. 

* Self-rising flour has both salt and baking powder in it, but you can make your own at home with the following formula: 1 cup self-rising flour = 1 cup all-purpose flour, minus 2 teaspoons + 1 1/2 teaspoons baking powder + 1/2 teaspoon salt.


Cream Cheese Frosting:
Ingredients:
8 oz. cream cheese, softened
8 oz. unsalted butter, softened
4 cups powdered sugar (or more to taste)
2 teaspoons vanilla

Directions:
In a large bowl, beat together the butter and cream cheese with an electric mixer. With the mixer on low speed, add the powdered sugar a cup at a time until smooth and creamy. Beat in the vanilla extract

Cake Assembly:
Bring cream cheese frosting to room temperature, and assure that your cake layers are completely cooled.

Using a serrated knife, carefully slice each cake round in half horizontally to create four cake layers.

Spread a spoonful of cream cheese frosting on the center of a cake plate, then place the first cake layer down. Spread one cup of lemon curd in the middle of the layer, keeping 1 inch away from the sides (curd will begin to spread as the cake is layered, so do not spread it to the edges). Top with the next layer and repeat with 1 cup lemon curd, next layer of cake, last cup of curd, then fourth layer of the cake.

Refrigerate until curd is re-firmed, then use half your cream cheese frosting to frost the top and sides of the cake, catching the crumbs and setting the crumb layer. Refrigerate 1 hour or until set.

Frost with the remaining frosting and decorate as desired. Serve slightly chilled.

November 18, 2012

Candied Lemon Peel


Last Halloween, M dressed up as a lemon head. I never eat lemon heads, but that night he carried around a box full and I ended up nabbing a few. My first thought when I tasted these tart, sweet candied lemon peels was, "Hey! These are like an all-natural, way more delicious, homemade lemon head!"

These lemon peels pack lots of pucker. As tangy as they are, don't get me wrong -- they're definitely 100% sweet treat. I love the slight outer crunch that gives way to a chewy center. I also love knowing that these are homemade. Once you make these lemon peels you'll start to get obsessed with candying all sorts of citrus peels... I can't eat an orange or grapefruit without saving the rind for candying!

A few ideas.... Dip each slice in melted dark chocolate, set on wax paper to cool, and dole out in favor baggies as hostess gifts or a thoughtful present this season. Chop them coarsely and sprinkle atop holiday cakes for an element of decorative shimmer and texture. Create beautiful crunchy and sweet chocolate bark with lemon peels and pistachios. Or simply keep a bowl out on the mantel for nibbling through the season. Next time you're using a lemon for its juice, reconsider tossing the peel. There's so much more to create!


Candied Lemon Peels
Ingredients:
8 lemons (washed in fruit & veggie wash, or organic)
4 cups sugar, plus extra for coating

Directions:
Cut top and bottom off each lemon. Use a vegetable peeler to peel off strips of skin, lengthwise from top to bottom. Place peels in a saucepan and cover with water. Bring to a boil, then reduce to a simmer for one minute. Drain and repeat two more times. Remove peels to a separate bowl. Combine four cups sugar with three cups cold water in the saucepan and bring to a boil. Add the lemon peels and reduce to a simmer. Simmer for one hour over low heat. Drain peels from liquid, reserving liquid for later use in drinks or recipes as desired.

Spread out the lemon peels on a baking sheet to cool. Allow to cool for 10 minutes, then toss with the extra sugar. Dry 8-10 hours or overnight, then store in an airtight container.

October 4, 2012

Chocolate Chip Walnut Blondie Thins.... With No Butter or Flour in Sight


Okay, I did it. I made dessert out of beans and other healthy things.   

"Gross! Ew!" my sister groaned on the phone when I told her my plan, "I like my dessert to be dessert and healthy stuff to be healthy."

I get you sister-friend, I really do.

But first you have to try these blondie thins. You'll want your dessert to be healthy and your healthy stuff to be dessert, and then you'll be so mixed up you'll have no choice but to agree with me when I say that these chocolate-chip walnut bad boys are too darn tasty to care what's in 'em.


The only thing I'll change next time is to double the batter and make them thicker, like traditional dessert bars. But then they wouldn't be thins (okay, I had to call them thins because I spread the batter thinly into the pan.... This was likely because I couldn't stop eating the raw batter, which is totally safe to eat and I'll probably make just a batch of that next time, too). We could just call them cookie bars, because they're soft, gooey, and chewy, just like the blondie's cousin, cookie.

Semantics aside, whether you bake them thin or thick you'll certainly be glad you did in the first place. Looks like I'll be having these (healthy) cookies at breakfast, lunch, and dinner!

Chocolate-Chip Walnut Blondie Thins: makes 16 squares. Inspired by Deep-Dish Cookie Pie. This recipe has less sugar and a few more taste-boosting ingredients.)
Ingredients:
1 can garbanzo beans (chickpeas), rinsed and drained
1/2 cup quick-cooking oats
1/4 cup cinnamon or regular applesauce
1.5 tablespoons canola oil
1.5 teaspoons pure vanilla extract
1/4 teaspoon baking soda
1/4 teaspoon salt
1/3 cup brown sugar
1 heaping tablespoon cinnamon
1/2 cup walnut halves, toasted and coarsely chopped
1/2 cup dark chocolate chips, coarsely chopped

Optional delicious-boosting ingredients:  *note: If not using, decrease applesauce by half
1 tablespoon ground flax-seed
1 tablespoon unsweetened coconut
1 tablespoon PB2 peanut butter powder or regular peanut butter

Directions:
Set aside an 8x8 non-stick baking pan. Preheat oven to 350 degrees (toast walnuts in there as it preheats as a time and energy saver). Meanwhile, add all ingredients except walnuts and chocolate chips to a food processor and process until smooth. Consistency and taste will be like a sweet, thick hummus. Stir in the walnuts and chocolate chips. Spread evenly into the pan, using damp fingers or spatula for greater ease. Bake 20 minutes. Cool 5-10 before cutting into 16 squares.

October 2, 2012

Chocolate Peanut Butter Cheesecake


Is it a giant Reeses cup? No, it's better than that. 

Yep, I said it's better than that.


I know. I couldn't have imagined that there was anything better than an enormous, platter-sized peanut butter cup either. But then this happened. As my birthday approached I jokingly said to M, "How about you bake me a cake this year?" All right, I was 30% joking and 70% seriously praying that someone other than a restaurant would serve me dessert on my birthday. 

Is it wrong to want your husband to bake you a cake? Is it so bad to realize that my husband is awesome in every other way, but by baking me a cake he could actually achieve being-the-perfect-husband for just a day? 

My mom said, "Lauren, you didn't tell him to do that!" I did. 
I might have even suggested it more than once. 
Oopsie. 


But dang! He knocked it out of the park! Does my husband know me or what? I almost fell over when I was hanging by the candy table at my S'mores Birthday Party (more on that totally fun shindig later) and out of nowhere came M, holding a candle-blazing cake stand with this on it. 

I had not expected him to bake for me. But I certainly didn't expect him to dream of a cake so outrageous... I swear the moment almost trumped our wedding proposal. 

You know you married the right man when he knows exactly what dessert will make you weak in the knees... something so peanut-buttery, so lusciously creamy, and so chocolate-fudgey as this. 
Cheesecake + Peanut Butter Chocolate = best birthday I've ever had. 


M, you're on as head birthday baker for the rest of my life.

Chocolate Peanut Butter Cheesecake: (adapted from Nigella Lawson)
Ingredients: (all should be room temperature before you start)
Base: 
1/2 (14-ounce) box cinnamon graham crackers (2 cups crumbs) 
1/2 cup salted peanuts 
1/2 cup dark chocolate chips 
4 tablespoons unsalted butter, room temp

Filling: 
1 bar regular cream cheese
1 bar 1/3 less fat cream cheese
3 eggs 
3 egg yolks 
1 cup superfine sugar
1/2 cup sour cream 
1 cup creamy peanut butter


Topping:
1 cup sour cream
1 cup semi-sweet chocolate chips 
2 tablespoons light brown sugar

9-inch springform pan

Directions: 
Preheat the oven to 325 degrees F. Process the crackers, peanuts, dark chocolate chips, and butter in a food processor. Once it comes together in a clump, turn it into a springform pan and press into the bottom and up the sides to make the crunchy crust. Put it in the refrigerator while you make the filling.

Add all the filling ingredients to a food processor and pulse until it becomes a smooth mixture.
Pour and scrape the filling into the crust and bake for 1 hour, checking after 45 minutes. The top, only, should feel set and dry.Take the cheesecakes out of the oven and set aside while you make the topping. 

Warm the sour cream and semisweet chocolate with the brown sugar in a small saucepan over a low heat. Gently whisk to blend in the chocolate as it melts, then take the pan off the heat.Spoon and spread the topping very gently over the top of the cheesecake, being as careful so as not to break the surface, though it is okay if  you do.  Put it back in the oven for a final 10 minutes. Remove the cake from the oven and cool. 

Serve when set. 

Make Ahead:
Make the cheesecake up to 2 days ahead. Do not cover until completely cold, then cover with a plate or plastic wrap, making sure that the covering does not touch the surface. Remove from pan and serve as directed in the recipe. This will keep in the refrigerator for up to 4 days total.
Freeze Note:
The cheesecake can be frozen for 1 month. Make sure it is thoroughly chilled then wrap, still in its pan, in a double layer of plastic wrap and layer of aluminum foil. Thaw overnight in the refrigerator and eat within 2 days. Do not worry about condensation that may occur. 

Pin it on Pinterest!

Links

Related Posts Plugin for WordPress, Blogger...