Showing posts with label Snack. Show all posts

June 23, 2013

Bacon Cheddar Deviled Eggs


 Deviled eggs are making a comeback! I adore eggs in every form, but deviled eggs are a special indulgence due to their extra-rich, creamy filling. For these deviled eggs I stole a note from twice-baked potatoes... that is, take the filling out, whip it together with extra fat (mayo for this, butter for potatoes)... and more fats like cheese and bacon... and then put it back in. This is how the ordinary becomes amazing!


I made these eggs for our book club picnic. We read David Sedaris's "Me Talk Pretty One Day," which is a hilarious compilation of short stories. Since the stories are brief, we made our bites brief, too.

From sliders, to mini pies, to cute little bunches of veggies tied up with a sprig of parseley, all of our menu items were small.

These eggs might be bite sized, but they're certainly not small on flavor! Don't underestimate just how luscious these cheddar-bacon filled deviled eggs are, and plan to make a few for each person you're serving to.


After all, I've never been friends with anyone who would say no to something with bacon and cheese... And since my book club ladies are some of the best, these eggs flew right off the plate and into our laughing, happy, story-telling mouths.

Bacon Cheddar Deviled Eggs: makes 24
1 dozen hard-boiled eggs (directions below)
4 slices bacon, cooked until crisp
1/4 of a medium white onion
1/4 cup mayonnaise
1/4 cup shredded sharp cheddar cheese
1/8 teaspoon paprika, plus more for sprinkling
salt to taste

Directions: To hard boil the eggs, place the eggs in a large pot of water and bring to a boil. Turn off and remove from the heat and allow to stand 12 minutes. Drain the eggs and shake in the pan to lightly crack the shells (this allows the cold water to get under the shells and aids with peeling). Fill the pan with cold running water for 2 minutes. Peel all of the eggs and set aside.

Cut each egg in half and gently remove the yolk with a small spoon. Add the white onion, mayo, and sharp cheddar to the food processor and process for a minute. Add the paprika and yolks and process until very smooth. Salt to taste. Crumble 3 bacon slices and stir into the yolk filling. Use a frosting piping bag to pipe the bacon cheddar filling back into each egg half. Crumble or slice the last bacon piece into 24 small pieces. Add a small bacon piece to the top of each egg mixture and gently sprinkle with the remaining paprika.

Chill. Can be made 4 hours ahead.

March 10, 2013

Homemade Soft Pretzels


I might not believe someone if they told me these soft-baked pretzels were super easy to make. I might think, Who makes soft-baked pretzels unless they have an inordinate amount of time on their hands? 

I'd probably be super skeptical of the whole thing, though very interested. But since I made these soft, chewy, salty pretzels myself for our German-inspired book club menu, I can vouch first-hand that they are in fact simple, streamlined, and quite easy -- so, listen up beginner cooks!

For all the writing and talking I do, it's surprising that I'm actually a "show, don't tell" type of learner. I'd rather see what I'm getting into before diving into the task, so I'll do the same for you here. You'll see how easy it really is to make these soft-baked pretzels. The only thing I can't share with you first-hand is the scrumptious and warm end result!

So gather all your ingredients....


Test that water temperature to be about 115 degrees....
I've killed yeast too many times for that!


Add the water, sugar, and kosher salt in the mixing bowl and stir to combine, then pour the yeast on top. 


Add the flour and butter and let the dough hook do its work. 
Put away you ingredients in the meantime. Hum a tune. Wipe your counter.

When that dough is nice and smooth, take it out of the bowl, spray the bowl with cooking spray, return it to the bowl and cover it to let it rise in a warm place.


Get ready for the fun part!!

Divide that dough up into 16 pieces, then roll each piece out into a rope and cross each end over each other to make cute little pretzel bows. 

Guess what? It doesn't matter if they're not perfect. Or if they're pretzel nuggets, rolls, or rods instead.

I put mine on a baking sheet and froze since I wouldn't be baking them until a couple days later. Once they were frozen on the sheet I piled them all into a plastic freezer bag, but you can just skip that step and put them straight onto an oiled baking sheet instead. 


Preheat your oven to 450.... Get your egg wash ready and your Kosher salt on the side....

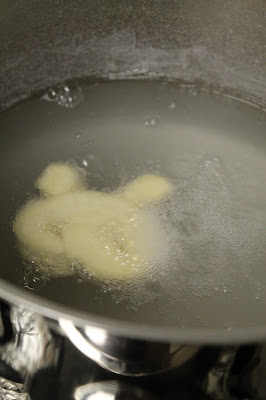
Pour 2/3 cup baking soda into 10 cups of boiling water. Check out that crazy foam!!


Drop those pretzel babies into the bath one at a time! All right, I admit my impatience made me do it two at a time.

Once they float to the top, rescue them back onto the baking sheet.


Once they're all out of the bath and back on the baking sheet, work your egg wash magic and sprinkle with salt.


Bake for 15-18 minutes or until deep golden, or looks like the picture below....

Cool on racks for 5 minutes before gorging on them while they're still hot!


See, you can do it, too! It's well worth the effort (pretend it was very involved and arduous, and you'll impress your friends and family to no end).

Maybe you'd like some spicy brown mustard with that? Cheese dip? Pants with an elastic waistband?
I'd recommend being prepared with all of the above.


Homemade Soft-Pretzels: makes about 16 palm-sized knots.
Ingredients:
1.5 cups water, warmed to about 115 degrees
1 T. sugar
2 t. kosher salt
1 package active dry yeast
4.5 cups all-purpose flour
2 oz. butter, melted
Vegetable oil spray
10 cups water
2/3 cup baking soda
1 large egg yolk, beaten
extra kosher salt

Directions:
Combine water, sugar, and kosher salt in the bowl of a standing mixer with dough hook attached. Stir to combine, then add the yeast on top and allow to foam, about 5 minutes. Add the flour and butter and mix on low speed until well combined.

Change to medium speed and knead until smooth and pulling away from sides of the bowl, about 5 minutes. Add more flour, 1 T. at a time, if the dough seems too sticky. 

Remove the dough from the bowl, spray the bowl with cooking spray, and return the dough to the bowl. Cover with plastic wrap and allow to rise in a warm place for about an hour or until doubled in size.

Preheat oven to 450 and line 2 baking sheets with parchment paper. Lightly spray with cooking spray. 

Bring 10 cups water to a rolling boil. In the meantime, divide the dough into 16 pieces and roll into a long rope. Hold each end of the rope and cross them over each other to create a pretzel knot. Press the center of the knot to adhere dough and ensure it keeps its shape in the boiling water. Place on the baking sheet, and repeat until all 16 are created. 

Pour 2/3 cup baking soda into the boiling water, then add the pretzels 1-2 at a time. Remove from the water after 30 seconds or it rises to the top. Return to the baking sheet. Brush each pretzel with egg wash and sprinkle generously with salt.

Bake for 15-18 minutes, turning to evenly brown if necessary. Cool 5 minutes on a wire rack, then enjoy! Best eaten immediately, but if you must store them do so in a brown paper bag. 


March 3, 2013

Whole-Wheat Parmesan Croutons


In 20 minutes you'll arrive at the perfect, fresh, and healthy topping for any soup or salad. These whole wheat croutons are wonderfully crunchy, flavorful, and make use of the ends of the loaves of sandwich bread that might otherwise go to waste.

Whole-Wheat Croutons: makes about 2 cups
Ingredients:
4 slices of whole wheat bread (stale, or the ends, it doesn't  matter!)
4 T. olive oil
1/2 t. salt
1 T. grated Parmesan cheese
1/4 t. crushed dried basil

Directions:
Preheat the oven to 325 degrees. Stack the bread and cut it into about 1" hunks. In the bottom of a large bowl, add the olive oil, salt, Parmesan  and basil and stir to combine. Add the bread to the bowl and stir to coat evenly with the olive oil. Spread evenly on a baking sheet and bake 10-15 minutes, then stir, and bake another 10-15 minutes or until crispy and golden. Serve immediately and store any leftovers in an airtight container for up to 3 days.

February 17, 2013

Chocolate-Mint Bread: A Healthy Answer to Thin-Mint Cravings


This year for Valentine's Day, Matt was on call at the hospital. This meant that when he quietly crept out of the house in the dark, early hours of Valentine's morning, I wouldn't see him again until two days later. Of course I wanted to leave him a treat that would make him think of me during his long, exhausting, and hunger-inducing shift.... A snack that would be like a giant Valentine's hug to both the stomach and heart.

Cue these delightfully moist, rich chocolate-mint breads. I baked them in small heart-shaped spring-form pans that I use for all love-related baking. The batter an easily be used in any size from cupcake to loaf. In fact, I used some left over batter to pop out a few cupcake sized breads that I ate warm out of the oven. I needed to taste test and make sure that they were as delicious as I hoped they would be!


You might be thinking, "chocolate-mint bread? You mean cake, right?" Nope. Bread it is. It's got the perfect hint of sweetness from a touch of sugar, as well as chocolate chips folded into the batter, but otherwise this bread is wonderfully spongy and dense like any other breakfast loaf... Oh, and I've been withholding the best part. It's healthy. 

What? I don't want to contribute to fatigue, weight gain, or clogged arteries in my husband? Surprise! Let's feed the man a snack he can really dig into and never know it's made without any fats from oil or butter.

Chocolate and mint are one of M's favorite flavor combinations. This bread is spot on. The chocolate flavor pervades, while the little bit of peppermint extract hits the right cooling note there at the end. Every bite is filled with the flavor of classic Thin Mint cookies, just in a soft, super-comforting texture.

And isn't that what love is? Comforting, cool, sweet, delicious, and good for you.


Chocolate-Mint Bread
Ingredients:
1 cup plain unsweetened Greek yogurt
1/2 cup granulated sugar
2 eggs
1 T. pure vanilla extract
1/4 t. peppermint extract
1/4 cup milk (I used 2%)
1/2 cup white whole-wheat flour
1/2 cup minus 2 T. white flour
2 T. cornstarch
1/2 cup unsweetened cocoa powder, plus extra for dusting pan
2 t. baking powder
1/2 t. baking soda
1/2 t. salt
1/4 to 1/3 cup each of semi-sweet and dark chocolate chips

Directions: Preheat oven to 350 degrees. Spray or wipe pan of choice with cooking spray, then dust with cocoa powder. In a medium bowl stir together the Greek yogurt, sugar, eggs, vanilla and peppermint, and milk. Combine thoroughly. In a large bowl combine white-wheat flour, white flour, cornstarch, cocoa powder, baking powder, baking soda, and salt. Make sure they are blended completely, then make a well in the dry ingredients and pour in the wet. Stir to combine, making sure not to over-mix. Gently fold in the semi-sweet and dark chocolate chips.

Pour into the pan and even out the top with a spatula, then drop the pan on the counter from about 6" high a few times to release air bubbles. Bake 20-25 minutes for cupcakes or mini-loaf pan, and 45-50 minutes for a large loaf. Cool 10 minutes on wire rack in the pan, then release from the sides with a knife and cool completely on a wire rack. Wrap tightly in plastic wrap to store.

March 12, 2012

Cookies for Breakfast!


Yes, please!

These chewy, oaty, and simply fun to eat breakfast treats will give you a reason to jump out of bed. They are made with nourishing whole-wheat flour, satisfying whole-rolled oats, and then bumped into the over-the-top fantastic category with favorite add-ins like toasted nuts and plump dried fruits. I credit my mother with inspiring the baking of these cookies. She visited two weeks ago and asked if we could bake a healthy oatmeal cookie she could eat for breakfast. I thought, 'sure, why not!' So we did. And they were incredible.

I don't like my breakfast to have much added sugar....I get more than enough of that as I continue throughout my day. So I love the fact that these cookies contain only natural sugars for the perfect amount of sweetness. So far I've made two varieties, and I've included both recipes here. One recipe, while still being very healthy, contains oil and more honey than the second variation, which is lower in sugar and omits fat. Both are delicious and both are good for you.

I plan to make more flavor varieties and I'll be sure to share those with you! The next batch I have been dreaming of will use the same basic breakfast cookie recipe, but will include shredded carrot, coconut, raisin, toasted walnut, and crushed pineapple ... I am hoping that it will be everything I love about carrot cake but made appropriate for breakfast.

Try out this morning delight for yourself. It's easy enough, but so satisfying and smile inducing you'll be baking a new batch every week. Since I first made them, M has been grabbing one off the counter every morning and keeps asking for more, and when I get into work every day I sit down at my desk, unwrap my own and get ready to enjoy eating every last bite. Seriously, can the start to the day get much better than that?


Variation 1: Classic Oatmeal Breakfast Cookies
Ingredients:
 Dry:
1 cup whole wheat flour
1 1/2 cups of whole rolled oats
1/2 tsp baking soda
1/2 tsp baking powder
1/2 tsp salt
3 Tbsp Cinnamon
1/2 tsp Pumpkin Pie Spice (optional)
Wet
1/2 cup honey
1/2 cup oil
1 Tablespoon Molasses
1 egg (beat together with 1 Tbsp Water)
1 tsp Vanilla
Add ins I used: 1/2 cup dried cranberries, 1/4 cup unsweetened coconut, 1/4 cup sliced almonds

Directions: 
In a large bowl, mix all the dry ingredients together. In a medium bowl, mix all the wet ingredients together.Form a well in the middle of the dry ingredients and pour in the wet, then stir until just combined. Fold in the Add-In ingredients until evenly distributed. Place bowl in fridge for 20 minutes hour to get firm. Preheat oven to 340 degrees. Using wet hands, form 1.5 inch balls, then press down onto a cookie sheet to flatten. Repeat until all of the mixture is gone. One batch will make from 12-15 breakfast cookies. Bake 12-15 minutes or until the edges are just golden-brown.


Variation 2: Slightly less fat and lower sugar version
Follow directions as above, except omit oil and honey as specified. Instead, use 1/2 cup cinnamon apple sauce, 1/4 cup peanut butter, and 1/4 cup honey. Add ins for that version were 1/2 cup dried blueberries, 1/4 cup unsweetened coconut, and 1/4 cup chopped dry-roasted peanuts.


January 29, 2012

The Easiest and Most Delicious Healthy Muffins You'll Ever Make

It's a long title for a muffin, I know. But I had to describe these muffins accurately. 


These muffins are healthy! And ridiculously easy! And simple! Best yet, they are absolutely delicious. 


Actually, they are based on a scone recipe. Have you met a scone that wasn't baked with layers of cold butter? I hadn't, until I came across this South African scone recipe. It was fabulous, and I didn't have to travel to South Africa because instead it came to me. 


An intern at work, who was in the States for grad school, but was originally from South Africa, gave a presentation.  After her slide show she passed around her freshly baked scones, which she explained were her grandmother's recipe. When I looked at the accompanying recipe I was shocked that there was no butter and that they were remarkably simple. I went home and immediately adapted the recipe for breakfast the following morning. I wanted the scones to be even more nutritious. I swapped the oil with pumpkin puree, and the white flour for wheat. 


Voila!


I had a scrumptious fat-free, light and fluffy pumpkin "scone". 


Since these are baked in silicone muffin cups, I am going to just go ahead and call them muffins instead of scones.... but wonderfully, they bear the same airy, moist crumb as a scone. 


For this batch I stirred in fresh cranberries. When they baked, their beautiful magenta juice burst into whimsical swirls against the backdrop of orange batter. Doesn't it almost look like a flavor ribboned scoop of ice cream? 


You can make your own flavor combinations in these muffins, which is what's fun about it. Keep the base the same, but you could substitute apple sauce for the pumpkin puree, or toss in nuts, dried fruits, or blueberries. You could even get a bit decadent with chocolate chips. There have been far worse combinations than pumpkin and chocolate...

Enjoy these muffins gently warmed, with a smear of jam or butter. I'll warn you that they will disappear quickly (they do in my house), but they are so easy to make that you could put another batch on the table just as fast.... which is why they certainly deserve their long, descriptive title, and I hope that you agree!


...The Easiest and Most Delicious Healthy Muffins...  adapted from "Ma's Scones"
Ingredients:
1/3 cup pumpkin puree
1/2 cup milk
1 egg
zest of 1 orange
2 cups white-wheat flour (I use Trader Joe's)
4 teaspoons baking powder
3 teaspoons granulated sugar
pinch of salt
1 cup fresh cranberries

Directions: 
Whisk together the pumpkin, milk, egg, and orange zest. In another bowl, sift together the flour, baking powder, sugar, and salt. Add the wet ingredients to the dry and stir until just incorporated (do not over stir, you will get tough baked-goods!). Gently fold in the cranberries. Divide evenly among 8 silicone baking cups or greased and floured muffin tin. Bake at 400 degrees for 15-20 minutes. They are done when a toothpick comes out clean. 

January 20, 2012

When Lunch Is Child's Play


Recently one of my co-workers observed that I eat like a child. I objected. Didn't she know that I eat everything except for mustard and caviar? Did she know about my constantly revolving cravings for Thai, Indian, Mexican, Malaysian, and other ethnic foods? If I eat like a child, I eat like a child who has conquered the kitchen tables of far off lands!

Then I realized that I was fighting what was actually a wonderful truth. Regardless of all else that I eat, I absolutely do take immense pleasure in the simple, delicious joys of childlike food combinations. There is an intense comfort in chicken fingers dipped in ketchup, a big slice of apple pie, or my regular lunches of peanut butter and jelly.

Which brings me to this lunch favorite:


 Peanut Butter Banana Pizzas. Oh, the joy!

The base is always delightfully chewy, fluffy Middle Eastern Flatbread.

Then I make them two ways:
One has a layer of rich, chocolatey Nutella, which is then layered with creamy peanut butter and topped with sliced bananas. 


The second way involves jelly and not chocolate. Peanut butter is spread on first, then the preserves, then slices of banana on top. And a sprinkle of cinnamon for that warm, inviting spice.


Cut it into pizza-shaped slices and lunch has never been more fun, simple, and nostalgic.

I'm not going to write down an ingredient list, or cooking directions. There are none -- it's exactly how I described it here, and the pictures are worth all of those words. Now go make one for yourself and experience the delights of this sweet and savory combination that will keep you both full and happy.... in your stomach, and in your memories.

And next time someone comments that you eat like a child, say, "thank you" and get back to eating.

January 18, 2012

Roasted Red Pepper Hummus


Super smooth, tasty, and good for a crowd. I made this last Saturday night when a bunch of friends came over for drinks before we all headed out on the town. It was quickly devoured atop crunchy multigrain crackers. At least we could say our snacking was the one healthy activity of the evening!

The red peppers give it the color of a smoldering, baking hot sunset, but the flavor is sweet, not spicy. Since it's a gourmet-feeling spin on classic hummus it's sure to impress your guests (this one got a few very rave reviews). You'll want to make enough for yourself to set aside for the next day's snack, because as I learned, if you serve it all there's not a chance of leftovers!

Roasted Red Pepper Hummus:
Ingredients:
2 (14-oz) cans garbanzo beans
1 jar roasted red peppers
1/4 t. garlic powder
1/4-1/2 t. red pepper flakes
olive oil to reach desired consistency
salt to taste

Directions: Rinse and drain beans and add to food processor along with the roasted red peppers (removed from their juice or oil, but not drained.) Turn on processor and slowly add oil until it begins to turn into a smooth puree. Stop processor. Add garlic powder, red pepper flakes, and a pinch of salt. Process again, adding oil until you reach your desired consistency (I like mine thick) and it is smooth. Salt again to taste. Serve with pita wedges, crackers, or sliced vegetables.


January 3, 2012

Nonna's Biscotti Two Ways

I couldn't decide what kind of biscotti to bring to my sister's house on New Year's Day, so I decided not to decide at all.


Instead, I just made both kinds I was considering.

I was accompanied on the bus to Manhattan by my tin of dark chocolate-hazelnut biscotti and cranberry-hazelnut biscotti. It was the perfect company. There were five other people on the bus who were as crazy and as sober as I to take an 8am bus on New Year's Day. They slept the whole time.

I tasted my biscotti. First the dark chocolate-hazelnut. What can I say about that combination .... other than "Baci" and "Nutella"?


Then the cranberry-hazelnut. Chewy and sweet. Slightly more tame but no less delightful.


Hazelnuts provided a great crunch to these biscotti, but you don't have to limit your flavor combinations when baking up this treat, either. It's a New Year, so take some new chances. Perhaps you enjoy peanuts and chocolate? (I do) Or little bites of dried apricots with almonds and white chocolate?(Yum, sounds good!) Do it all.


But in the meantime, here is the recipe for my Biscotti Two Ways, which is code language for "Biscotti Your Way."

Nonna's Biscotti Two Ways
Ingredients:
4 eggs
1/2 cup oil
2.5 cups flour, plus 1 extra cup for adding in
2 1/3 t. baking powder
1 t. vanilla extract
3/4 cups sugar
1/2 t. cinnamon
Plus
1/2 cup dark chocolate chips
1 cup chopped hazelnuts, toasted
1/2 cup dried cranberries


Directions:
Preheat the oven to 375 degrees. In a large bowl, sift the flour, cinnamon and baking powder. In another, mix the sugar, eggs, and oil. Combine all the ingredients together, then add enough flour until the batter is just no longer sticky and pulls away from the sides. Divide the batter into two bowls. To one, add 1/2 cup dark chocolate and 1/2 cup hazelnuts. To the other, add 1/2 cup hazelnuts and 1/2 cup dried cranberries. Stir until fully combined.
Form two relatively flat, long loaf and place on a floured baking sheet. 


Bake about 25 minutes, or until the loaf is just baked but still soft. Cut on a slight diagonal into 1/2 inch wide cookies, turn each cookie on its side, and bake for another 5-10 minutes per side or until crunchy and golden brown. Cool on wire racks.


December 2, 2011

Maple Cinnamon Granola


Crunchy, nutty, and positively scrumptious in cold milk. I twisted a recipe for regular granola and incorporated the rich flavors of maple, cinnamon, and vanilla. M was asking me to get granola from the store so he could mix it into his favorite breakfast cereals. I knew I had whole rolled oats, and I also knew that store bought granola's are delicious but also fraught with fat and sugars. It was time to try my hand at a granola I had some control over.

The gently spiced sweetness of the cereal is balanced by its generous use of toasty nuts, including walnuts, peanuts, and sunflower seeds. Each time I've baked up a batch my mind has been exploring the creative possibilities. I plan to bake a batch that incorporates pureed pumpkin and another that involves peanut butter (two of my favorite flavors). It would be easy to do -- simply stir in the different flavors when mixing up the wet ingredients.

This granola is simple to make and the big batch will last you well throughout the week... which is good, because it will easily find its way into more than just your morning cereal bowl. Try it on top ice cream at dessert, or over Greek yogurt for lunch, too.


Maple Cinnamon Granola
Ingredients:
2 cups whole rolled oats
1 cup toasted walnuts, coarsely chopped
1/2 cup coconut
1/2 cup unsalted, shelled sunflower seeds
1/4 cup Fiber One original cereal, finely crushed, or wheat germ
1/4 cup roasted peanuts, chopped
1/4 cup honey
1/4 cup real maple syrup
1 t. cinnamon
2 t. pure vanilla extract
Optional: dried fruit such as blueberry, cranberry, and cherry

Directions:
Grease a 15x10 baking pan. In a large bowl combine the oats, walnuts, coconut, sunflower seeds, Fiber One or wheat germ, and peanuts. In another bowl whisk the honey, maple syrup, cinnamon, and vanilla extract. Stir the wet ingredients into the oat mixture. Pour into the baking pan and spread out evenly. Bake in a 300 degree oven for 30 minutes or until light golden brown, stirring after the first 20 minutes. If desired, stir in dried cherries, blueberries, or cranberries.

Spread on a large piece of foil to cool completely. Store in an airtight container for up to a week or freeze for two months.

July 18, 2011

Breakfast Delight: Blueberry-Wheat Power Muffins

I am taking a break from my updates about eating in Italy because I've been cooking too many other things I want to share. But I'll be back with that, because boy have I got the best of recipes straight from the Amalfi Coast (think freshly made gnocchi in bright lemon-basil cream sauce, homemade vegetarian ravioli in pumpkin sauce, and delightful lemon cream desserts).

In the meantime I thought I'd share my daily breakfast. I recently started a new job and what I don't have time for is a sit-down bowl of cereal or oatmeal. What I do have time for is a deliciously soft, huge nugget of muffin. Healthy muffin that is. I can't imagine starting my day any other way.


These muffins are incredibly satisfying, and at the same time, extremely healthy. Healthy muffins can often turn out like dense, inedible hockey pucks... These are not so. They have a light, moist crumb, and a spongey texture laced with bursting and juicy fresh blueberries. Crunchy walnuts are the perfect hearty topping (no fattening sugar streusel here).


Plus, mine are baked in heart-shaped muffin molds, which brings just a little smile to my breakfast.


Oozing, fresh blueberries pop in every mouthful....


These muffins are made entirely from white-wheat flour, which I buy at Trader Joes, which is high in fiber and nutrients. Each muffin also contains barely any fat and is low in sugar, as the recipe uses two whole cups of yogurt for its sweet flavor and moisture. These are no-guilt muffins with all of a muffin's delights.


It's definitely a breakfast my day (and time crunch) can get behind.

Blueberry-Wheat Power Muffins:

Ingredients:
2.5 cups white-wheat flour
1 cup quick cooking or instant oats
1/2 cup granulated sugar
1 T. baking powder
1 t. baking soda
1/4 t. salt
2 t. cinnamon
4 T. ground flaxseed (optional)
2 6-oz. containers vanilla non-or low-fat yogurt
1 6-oz. container blueberry non- or low-fat yogurt
1/2 cup reduced-fat milk
3 T. canola oil
2 t. vanilla extract
1 large egg
1.5 cups fresh blueberries
walnut pieces

Directions:
Preheat the oven to 350 degrees. Place cupcake liners in cupcake tin and lightly spray with non-stick cooking spray. Sift together all dry ingredients in a large bowl. Make a well in the middle of the dry ingredients. In another bowl, whisk together all of the rest of the ingredients (wet), except blueberries and walnuts. Pour the wet mixture into the dry mixture well and mix lightly until barely incorporated. Gently fold in the blueberries.

Portion out tablespoons of mixture 3/4 of the way high in each cupcake tin. Lightly press walnut pieces on top of each muffin batter and bake until lightly golden and puffy, about 20 minutes. Cool on a wire rack 5 minutes, then carefully remove each muffin and cool completely on the rack.

May 26, 2011

m + M Wedding Biscotti


Our friends Mindy and Mark (m + M) are getting married next weekend! Congrats, you two!

Matt and I can't make their wedding because we'll be on our honeymoon (our wedding is just three days away!), but we could at least be there in spirit by baking some celebratory biscotti for m + M to serve to their wedding guests.


The great thing about biscotti is that it keeps for weeks. This helped us avoid the freshness issue that might have been caused by baking this tasty treat in advance. This recipe is my Nonna's, which was passed on by her childhood friend from Italy, Lucy. With a festive twist on tradition, I brushed each end of the biscotti in melted dark chocolate and dipped them in chocolate and colored sprinkles.


This recipe is wonderfully simple. With only six ingredients, it begs experimentation with your favorite add-ins or toppings (nuts, dried fruits, various chocolates, etc.). Crunchy, mildly sweet, and fabulous dipped in coffee, Matt and I have been transported straight to our Italian honeymoon every morning as we've indulged in the extra ends of the cookie loaves that didn't make it into the batch for m + M.

We love m + M for many reasons, one of which is a shared love for food and cooking. Thanks, m + M, for the chance to be a culinary part of your special day!

Lucy's Biscotti (Nonna's recipe)
Ingredients:
4 eggs
1/2 cup oil
2.5 cups flour, plus 1 extra cup for adding in
2 1/3 t. baking powder
1 t. lemon or vanilla extract
3/4 cups sugar


Directions: Preheat the oven to 365 degrees. In a large bowl, sift the flour and baking powder. In another, mix the sugar, eggs, oil and flour. Combine all the ingredients together, then add enough flour until the batter is just no longer sticky and pulls away from the sides. Form a relatively flat, long loaf and place on a floured baking sheet. Bake about 25 minutes, or until the loaf is just baked but still soft. Cut into 1/2 inch wide cookies, turn each cookie on its side, and bake for another 5-10 minutes per side or until crunchy and golden brown. Cool on wire racks.

To chocolate dip, melt chocolate in a double boiler. Brush one side of each end of the biscotti in chocolate and pour 1 T sprinkles over it. Place on a wax paper then refrigerate until the chocolate is firm.

Links

Related Posts Plugin for WordPress, Blogger...