May 28, 2010

Weeknight Chicken Parmesan

Ready in 15 minutes, without the fuss.


Since my nightly cooking is just for M and myself, I am not exactly willing to jump through hoops every evening to produce dinner for two. Maybe later on when I'm feeding a family of four or five, sure, but for now it simply doesn't seem reasonable (or very green) to light the oven, have three pots going on the stove and four separate cutting boards all over the place on a regular basis (though that certainly does happen often).

So, I'm always looking for more energy-friendly, time-efficient ways to cook the same meal that would take all of the above effort and clean up. Most chicken parmesan recipes that are healthy involve baking the chicken in the oven. My shortcut, cooking it on the stovetop, is just as healthy and far faster than using the big old oven to cook a couple of cutlets. 

I also shortcut on the breading method by using light mayo as the "glue" for the breadcrumbs. Thus, I skip the whole ordeal of beating an egg in a separate dish, throwing most of the egg out anyway, and having yet another item to wash later (I know, I'm being super picky about the process, but I hate wasting food and  having tons of clean up). Anyway, the result is a deliciously browned, pan-fried chicken parm meal that's ready in no time at all. Boil the pasta while the chicken is busy getting crispy in the pan, heat a bowl of sauce in the microwave at the same time, and that's about all there is to it!

Weeknight Chicken Parmesan & Pasta: (serves 2)
Ingredients:
For the chicken:
2 small boneless, skinless chicken breasts or 1 large
4 T. light mayonnaise
1/8 cup grated parmesan cheese
1/8 cup whole wheat breadcrumbs
1 T. dried Italian seasoning
salt & pepper
1 T. olive oil
2 oz. part-skim mozzarella cheese, sliced

For the pasta:
1 cup gemelli or other pasta
1.5 cups prepared homemade tomato sauce (or jarred sauce)

Directions:
Salt the pasta water in a medium pot and set to boil.

Meanwhile, pound the chicken breasts to 1/2 inch thin with a meat tenderizer on a cutting board between two sheets of wax paper. Blot dry with a paper towel to ensure that the mayo will stick. Using a knife or a spatula, coat each chicken breast evenly with the mayo. In a shallow dish, combine the grated parmesan, breadcrumbs, Italian seasoning, and a bit of salt and pepper. Dredge each chicken cutlet in the coating, pressing to ensure that it sticks evenly.

Preheat olive oil over medium-high heat until it shimmers and the pan is hot. Place each cutlet down in the pan, ensuring that there is enough room around each one for vapors to evaporate. Do not move the cutlets -- allow them to brown evenly for 4-5 minutes on one side.

Check your pasta water: add the gemelli and allow to boil until al dente.
Put the sauce in the microwave, covered, and heat for 4 minutes, stirring halfway through.

Gently flip your chicken over to the other side. Allow to cook for 3 minutes. Then top with slices of mozzarella and turn the heat off. Allow the mozzarella to melt over the chicken parmesan while you drain the pasta. Plate the pasta, then place the chicken parmesan over it. Top with pasta sauce and bring the remaining sauce to the table for extras. Enjoy!

May 26, 2010

Curried Tofu over Spicy Peanut Noodles

Yum! Fresh Thai food for dinner with no delivery man in sight. Curried tofu is pan-seared with a mix of fresh and crispy vegetables, then tossed with whole wheat linguine in homemade spicy peanut sauce. Topped with crunchy roasted peanuts, it's a meal that's both hearty and healthy... and completely addicting.

Curried Tofu over Spicy Peanut Noodles: (serves 2)
Ingredients:
1/2 lb. extra firm tofu, drained, pressed, and cut into 1" cubes
2 T. yellow curry powder
2 cups assorted fresh vegetables. Here, I used:
  • Yellow & red bell pepper
  • Green beans 
  • Sugar snap peas
  • Carrots
  • Broccoli florets
1 T. olive oil
1/2 box whole wheat linguine pasta
1 recipe of Thai peanut sauce
1/8 cup roasted peanuts, coarsely chopped
salt & pepper to taste

For the tofu, preheat the olive oil in a medium sized pan over medium-high heat. Pour the curry powder onto a cutting board, then press each side of the tofu into the powder to season. Place the curried tofu cubes down in the hot pan, and allow to cook on each side, turning only once each side has become lightly golden and crispy. Then, add your vegetables and allow to cook until heated through but still lightly crispy.

Meanwhile, fill a large pot halfway with tap water and salt generously. Bring to a boil, then add the linguine. Cook the pasta until al dente, then reserve 1/2 cup of the pasta water before draining. Add the drained pasta back into the pot and pour the peanut sauce over it, tossing to coat well. Add the reserved pasta water in small amounts to thin out the sauce.

Add the tofu and vegetables to the pot with the linguine, and toss well. Salt & pepper to taste. Portion out into two bowls, then top with the chopped peanuts.

Thai Peanut Sauce

My Thai peanut sauce is a little bit different every time. It always consists of a little bit of this and a little bit of that until it tastes just right and I have the amount of it that I need. For the purposes of getting the recipe down here, though, I've pinned down the essential ingredients in approximate amounts, but you should feel free to adjust to your liking. 

Most peanut sauces have fewer ingredients, some with just peanut butter, soy sauce, rice vinegar, and water. I think that the three essentials of Thai cooking are basil, garlic, and ginger, and so these get included in my sauce, along with lots of red pepper flakes and hot sauce for spice. Regardless of how you like yours, this is an incredibly satisfying and delicious sauce that is versatile for dipping or pouring over rice or noodles.

Spicy Thai Peanut Sauce
Ingredients:
1/4 cup smooth honey roasted peanut butter (not natural)
1/8 cup reduced sodium soy sauce
1/8 cup milk, coconut milk, or water
2 T. rice vinegar
1 T. sesame oil
1 T. hot sauce or chili paste
2 t. garlic powder or one fresh garlic clove, minced and pressed into a paste
2 t. dried basil or 1 T. fresh
2 t. curry powder
1 t. Chinese Five Spice
1/2 t. ginger powder
2 t. crushed red pepper flakes
1/4 of a lemon, freshly squeezed (you may want to wait to squeeze the lemon over the dish you're serving with the sauce so that the milk does not curdle. If you have used water, feel free to mix the lemon in)

Whisk ingredients together until well blended, or use a processor to blend. Adjust to taste.

If you don't have all of the above spices or ingredients, don't worry. You can substitute regular white or cider vinegar for the rice vinegar, and pumpkin or apple pie spice for the Chinese five spice, etc. 
A well stocked spice cabinet is the most useful way to add flavor to a dish though, so definitely keep your eyes peeled for a good spice store nearby and start collecting!

May 25, 2010

Spicy Jerk Pork Chops

 
Pork chops never interested me in the least bit. All previous experience with this "other white meat" had been bland, dry, and completely unappealing. So when I moved to Philadelphia, and thus began cooking dinner nightly for M and myself, his relentless requests for pork chops were unsettling. What could possibly be alluring about pork chops?

Since cooking with them for the past year and a half, I have most certainly discovered their appeal. Mainly,  by choosing good cuts, not overcooking them, and exploring a variety of preparation methods I have come to really enjoy pork chops. I've found that bone-in is delightfully rich and flavorful, and also that the bone is useful for holding the meat together when it is going to be stuffed with delicious fillings such as cheese and prosciutto. Center cuts are great for coating with breadcrumbs, toasty pecans, or crunchy cornmeal. 

This recipe is for a juicy, center cut pork chop that is smothered with freshly prepared spicy jerk rub. Don't worry, it all only sounds laborious. Really, it's incredibly easy and fast for a weeknight meal that only tastes like it took hours to prepare.

Spicy Jerk Pork Chops: (serves 2)
Ingredients:
1/4 cup diced white onion
1 t. dried thyme
1 t. sugar
1 t. salt
1/2 t. black pepper
1 t. cayenne pepper
1/2 t. pumpkin pie or allspice
1/8 t. apple pie spice
1/2 t. cinnamon
two 1/2 inch thick center cut pork chops

Mash together the white onion, thyme, sugar, salt, pepper, cayenne, and spices into a coarse paste. Alternatively, pulse the ingredients in a small processor. 


Preheat a lightly oiled ribbed grill pan over medium heat. Pat each pork chop dry, then rub on both sides with the jerk paste. Try to cover the chop in as much paste as possible. Using tongs, place each pork chop down on the grill pan and allow to sit without moving (for grill marks) for no more than 4 minutes a side to retain juice and flavor.

Serve with a side of fruit & nut couscous, and enjoy!


  • 1 teaspoon dried thyme, crumbled


  • 1 teaspoon sugar


  • 1 teaspoon salt


  • 1/2 teaspoon black pepper


  • 1/2 teaspoon cayenne


  • 1/2 teaspoon ground allspice


  • 1/8 teaspoon freshly grated nutmeg


  • 1/8 teaspoon cinnamon


  • two 1/2-inch-thick rib pork chops (each about 4 ounces)


  • Fruit & Nut Couscous

    This sweet and fragrant couscous recipe is bursting with chewy fruit and toasty hazelnuts. It is flavorful and unique, with abundant fresh apples, dried currants and apricots keeping everything juicy and moist. These sweet flavors are balanced by the use of rich vegetable stock, sauteed Spanish onion, and crunchy nuts. 

    This side is so yummy, it definitely threatens to steal the entire dinnertime show. Since it's so pretty and delicious, pair the couscous with a simple main protein, such as a cut of seasoned and sauteed pork chop or a serving of crispy roast chicken thighs.

    Fruit & Nut Couscous: (serves 2)
    Ingredients:
    1/8 cup large hazelnuts, coarsely chopped or halved
    1 T. olive oil
    1/2 large Spanish onion, diced
    1 Gala or Jona Gold apple, peeled and cut into 1/2 inch cubes
    1 cup vegetable or chicken stock
    5 dried apricots, cut in half, then each half cut into three pieces
    1/8 cup raisins
    1/2 cup couscous
    2 t. cinnamon
    2 t. apple pie spice
    salt & freshly ground pepper to taste

    Directions: 
    Heat a medium saucepan over medium-high heat. Add the hazelnuts and toast lightly, until fragrant, taking care not to burn. Remove nuts onto a separate plate.Turn down heat to medium.

    Heat the olive oil in the same saucepan, then add the diced onion, stirring with a wooden spoon to coat. Allow to saute approx. 3 minutes until lightly golden, then add the diced apple pieces and stir. Cook the apples and onions together for a few more minutes until both are golden and fragrant. Add the stock and bring to a gentle boil. Add the apricots, raisins, and couscous and stir. Remove from heat, cover, and let sit for five minutes. 

    Add cinnamon, apple pie spice, and salt & pepper. Fluff with a fork. Add the toasted hazelnuts back in and stir well, adding a few T of water if the couscous has absorbed too much liquid. Serve immediately.

    May 23, 2010

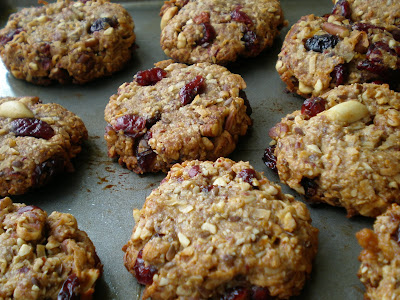
    Fruit and Nut Energy Rounds

    Bliss. On a baking sheet. These energy rounds are slightly gooey, perfectly toasty, and satisfyingly chewy. Generous amounts of honey, hints of coconut, and juicy dried cranberries make them addictingly, and yet naturally, sweet. Smooth honey roasted peanut butter and an assortment of nuts balance each bite with a salty, earthy edge. 

    These are perfect for breakfast, as a snack, or to fuel a workout. Though they can be stored up to five days in an airtight container, they will definitely not be hanging around that long...

    Fruit & Nut Energy Rounds
    adapted from 'Food & Wine' magazine
    Ingredients:
    1 cup whole rolled oats
    1 cup pecans
    1/2 cup salted, roasted peanuts
    1/2 cup honey
    1/4 cup honey roasted peanut butter
    5 dried figs, stemmed and quartered
    1 T flax seeds
    1 T canola oil
    Zest of 1 lemon
    1 cup dried cranberries or other currant
    1/2 cup coconut flakes

    Directions:
    Preheat the oven to 325 degrees. Lightly grease a baking sheet. 

    In the food processor, pulse the oats, pecans, peanuts, honey, peanut butter, figs, flax seeds, canola oil and lemon zest until coarsely chopped.


    Then, add the dried cranberries and coconut and pulse until barely incorporated.

    Scrape the mixture into a large bowl and stir well.


    Form rounds or bars that are 3/4 inches thick and place on the baking sheet 1" apart.

    Bake for 25 minutes, until they are lightly browned on the edges. Let them cool completely on the baking sheet before serving or storing.

    Roasted Beets


    While perusing the farmer's market this Sunday, I had to stop myself from bringing home all of the produce that was being sold. When I'm faced with a colorful, plentiful array of fruits and vegetables, inhibition goes into the wind and judgment out the window. It end to go a bit wild. I load my bags up with all I can get my hands on, then waddle home with much more than I can cook and far more than M & I can eat within the week.

    This time, I exercised some modest restraint, and instead consciously selected a reasonable array of items that I actually planned to prepare and eat. Among these: four sizable bulbs of beets.

    Beets are delicious, easy to make, and healthy. Serve these beets warm or at room temperature, with generous hunks of fresh goat cheese, tossed in a salad, or on their own with a drizzle of olive oil.

    Roasted Beets:
    Ingredients:
    4 medium to large beets
    2 T olive oil
    1 T balsamic vinegar
    1 t cumin
    1 clove garlic, finely chopped
    salt and freshly ground pepper

    Directions:
    Peel each beet, including the tops and bottoms. Quarter each, or cut into wedges if they are uneven in size. In a separate bowl, whisk together the olive oil, vinegar, cumin, garlic, salt and freshly ground pepper. Place the beets in a baking dish, then pour the dressing over them, tossing to coat evenly.

    Place in a 400 degree oven and bake for approximately 40 minutes or until tender, turning them half-way through.

    The result: perfectly tender and deliciously seasoned beets. Dice them into 1" cubes and serve as suggested above, or as part of your favorite recipe.

    Tip: When shopping for beets, try to choose bulbs of similar size to ensure even cooking time.

    Blue Cheese, Raspberry and Pecan Spirals

    The culinary disaster of my weekend.

    Our good friends M & M were having one of their famous potluck dinner parties... the kind where everyone brings something spectacular and we inevitably all eat ourselves into complete illness. Their counters are, without fail, covered with an impressive array of our friends' culinary risks, gourmet masterpieces, and downright delicious comfort foods. So, naturally, my brain's store of recipes and ideas was moving a mile a minute that day as I tried to decide what to bring.

    Well, I got a little too "creative." Five hours and a huge mess later, I found myself prying the fruits of my labor off of the baking sheet with a steel spatula with pathetically little success. Though they were seriously unattractive, these 'blue cheese, raspberry, and pecan pastry puff spirals' actually ended up being delicious. In hindsight, I know exactly what I would do differently. The first would be not to have made a recipe up off of the top of my head like I did here... The second would be to consider the fact that (hello!) the sugars from the exposed raspberry preserves would burn all over the pan when baked... And third, why oh why did I think it was a good idea to make my own flaky puff pastry from scratch for the very first time when I was bringing the resulting dish to a party?

    Next time, I'll use better judgment. However, with the modification below of baking this appetizer as a flat sheet instead of rolls, this recipe would actually be quite a success.


    Blue Cheese, Raspberry and Pecan Puff Pastry Bites
    Ingredients:
    1 recipe quickest puff pastry (below), or two-store bought sheets of phyllo dough
    6 oz. fresh raspberry preserves
    16 oz. good quality blue cheese
    1 cup coarsely chopped pecans
    1 egg, beaten

    Directions:
    Unroll the pastry dough on a lightly greased baking sheet. Using your fingers or a brush, egg wash the edges of the pastry to approx. 1 inch in. Spread the jam over the dough, then top evenly with the blue cheese, and then the pecans.

    Bake at 350 degrees until golden brown, 20-25 minutes. Remove from oven and allow to cool for a few minutes, then gently slide the "pastry pies" onto a cutting board. Using a pizza slicer, gently cut the dough into large, uneven triangles and serve.

    Quickest Puff Pastry (recipe from Danger Kitten Bakes. Thanks Elena!)
    2 1/2 sticks cold, unsalted butter  
    1/2 c cold tap water  
    1 tsp salt  
    2 c unbleached all-purpose flour

    Cut 2 sticks butter into 1/2 inch dice and refrigerate.
    Measure the water and stir in the salt to dissolve. Set aside. Coarsely dice the remaining 4 T butter. Place flour in the work bowl of a food processor and 4 T of butter. Pulse until the butter is absorbed--it should be ground finely, with no pieces of butter showing.
    Add the chilled butter and pulse a couple of times to distribute. Add the water with the processor running. Shape dough into a rectangle and place between 2 pieces of plastic wrap.
    Press dough with a rolling pin to flatten, then roll back and forth several times with a rolling pin to make a 12x18 inch rectangle.
    Peel away top layer of plastic wrap and turn dough over onto the floured work surface. Peel away the second layer of plastic wrap and fold the dough in thirds the short way, to make a 4x18 inch rectangle. Then roll the dough up from one of the 4-inch ends. Make sure to roll the end under the dough. Press the roll of dough out into a square, wrap in plastic, and refrigerate for 1 hour, or until firm.
    Use dough within 2 to 3 days. Or freeze up to one month and defrost in refrigerator overnight before using.

    May 22, 2010

    Blueberry Multigrain Pancakes

    Saturday mornings mean pancakes! Pancakes are perfect because they are a blank canvas for creativity. Chopped toasted nuts, fresh and dried fruit, even carrots and raisins (topped with a little cream cheese, it's like morning carrot cake) have all gone into our pancakes on one morning or another. This morning, we're craving sweet and tangy blueberries.

    Loaded with fruit, flaxseed, and whole grains, and topped with a blend of syrup and berry preserves, these pancakes are the powerhouse for the long bike ride we'll take after breakfast. Feel free to add whatever suits you, or whatever you have on hand.

    Multigrain Pancakes with Maple & Berry Syrup
    Makes 12 pancakes

    Ingredients:
    1 3/4 cup all-purpose flour
    2 T brown sugar
    2 t baking powder
    1/2 t baking soda
    1/4 t salt
    1 egg, slightly beaten
    1 1/2 cups milk
    3 T cooking oil
    2 T ground flaxseed
    1 T cinnamon
    2 t pure vanilla flavoring
    1 cup fresh or frozen blueberries

    For syrup: 1/4 cup maple syrup, 1/4 cup mixed berry preserves, 1 t cinnamon. Mix well and warm slightly in microwave.

    Directions:
    In a large bowl stir together flour, sugar, baking powder, baking soda, and salt. In another bowl, combine egg, milk, and oil. Add egg mixture at once to flour mixture and stir until just moistened (should be lumpy). Stir in blueberries.

    Preheat a large, lightly greased skillet or pan. You will know when the pan is hot enough when a drop of water sputters gently when tossed onto the pan. Your pan is too hot if the water immediately evaporates, or not hot enough if the water sits on the pan. Pour 1/4 cup batter onto the skillet for each pancake. When bubbles begin to form on the surface of your pancake, and the sides are slightly cooked, flip to the second side.

    Top with mixed berry syrup, and optional toppings of butter, cinnamon, cream cheese, or chopped nuts.


    Mango Pear Sangria

    It's Friday afternoon at 5:00, and I'm walking home from work in the 90 degree heat. Although it's not unusual for this craving to hit me once the warm weather arrives, my mind begins to envision juicy pieces of fruit and a glass pitcher. I begin to walk a little faster: I need to get home and make some sangria!

    I mix together the ingredients as quickly as I can and stir it well with a long, wooden spoon. Then, back in the frige it goes. Those flavors need to meddle together for as long as they possibly can before we're ready for a glass. The mango and pear soak up the brandy and liqueur, the wine fuses with the sugar and fruit juices... All becomes right in the world.

    There are many reasons to celebrate life on this perfectly cloudless, sunny Friday. The evening immediately turns into the weekend when M comes home and I pour us each a cold glass of this perfectly fruity, sweet, and lightly tangy white Sangria.

    Mango Pear White Sangria:
    1 750ml bottle of sparkling or regular white wine, chilled
    1/2 cup brandy or cognac
    1/4 cup orange liqueur
    2 t. superfine or powdered sugar
    1/2 cup orange mango juice (or regular orange)
    1 can pears in light juice, pears removed and cut into 1" chunks, juice reserved
    1 cup frozen or fresh mango, cut into 1" chunks

    Stir together wine, brandy, orange liqueur and sugar until the sugar is dissolved. Add orange mango juice, pear juice, and stir again. Add fruit and chill for a minimum of hour, or overnight for the best flavor.

    This recipe is also great with canned peaches, sliced white grapes, and sliced unpeeled oranges and lemons.

    May 21, 2010

    Tofu and Veggie Stir Fry

    The secret to tofu that you actually want to eat as an entree is....


    Placing the cubes (drained and pressed, of course) in a medium hot, lightly oiled pan and then leaving to do something else. Don't move the tofu! Don't stir them, shake the pan, hover over the stove... just forget about them for a good five minutes. Then return and turn the pieces over to reveal a perfectly browned crust. Repeat on all sides, or as many sides as desired before you become impatient and want to eat dinner already.

    Giving the tofu (use firm or extra firm) time to simply sit on the heat and form that perfectly browned crust will change your tofu-eating experience from what were perhaps soggy, uninteresting cubes of soy to fragrant, nutty squares whose crispy outer shell give way to a warm, soft center.

    Toss in loads of mixed vegetables... Snow peas, sliced white onions, carrots, green beans, edamame, water chestnuts. I especially love the way broccoli soaks up the sauce I eventually pour over my stir fries, so I usually put tons of it! Crank up the heat and stir until just cooked through but the vegetables are still lightly crispy.

    Add cooked rice and stir again to heat through.

    In this case, I topped the stir fry with a generous serving of peanut chile sauce, but that was only to use up the rest of the leftover sauce I'd had from when I made it earlier this week. Other favorite stir fry sauces include soy-peanut sauce, sweet and sour sauce, and curry sauce. Those sauce recipes will be on their way soon, but for now, I'm ready to eat this!


    May 20, 2010

    Sweet Chicken Meatballs

    Chicken meatballs are simply the best. They are part of the ultimate comfort food dish of pasta and meatballs, yet have none of the heavy or greasy feeling of beef meatballs. These only leave you with happy thoughts and an empty plate for seconds. 

    My recipe yields a texturally light, juicy meatball with addicting undertones of fragrant spices, such as cinnamon and clove, that you would not find in a traditional beef meatball. I use these unexpected spices because they compliment the lighter flavor inherent in ground chicken, while introducing a sweet, deeply flavored quality to every bite. Pile these meatballs on top of savory tomato sauce, generous heaps of al dente pasta, and enjoy with a good glass of red wine. Yes, life is good.

    Sweet Chicken Meatballs
    Ingredients:
    1.5 lbs ground chicken meat (preferably fresh from the butcher)
    1 large white or Spanish onion, finely diced
    2 cloves garlic, finely diced
    3/4 cup fresh whole wheat breadcrumbs
    1 egg, lightly beaten
    2 t cream or milk
    1 T dried Italian seasoning
    1 T cinnamon
    1 T pumpkin pie spice
    2 T Worcestershire Sauce
    1 T ketchup

    Directions:
    In a large bowl, combine all ingredients using your hands or by folding together with a spatula. Do not over-work the ingredients, as your meatballs will become dense and tough the more they are mixed. 

    Preheat the oven to 350 degrees. Lightly grease a large, shallow baking pan (I use our turkey roasting pan from Thanksgiving). Using your hands, scoop out enough meat to form somewhat medium-large sized meatballs of approx. 1.5 inch diameter. Shape them into a ball by lightly rolling between the palms of your two hands. Place each meatball down in the baking pan.

    Bake approximately 30-35 minutes or until golden brown and bubbling. Serve, or allow to cool before storing or freezing.

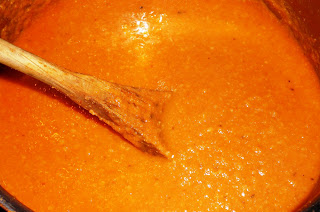
    Spicy and Sweet Homemade Pasta Sauce

    A favorite memory of growing up is actually an aroma... the sweet, slightly tangy smell of long and slow simmering tomato sauce. On pasta night, Thursday nights, my mom would stand at the stove preparing a number of ingredients that remained a mystery to me at that age. Then she'd ask me to stir it occasionally to keep it from burning while she went out for her afternoon walk.

    I loved the smell of that sauce, for it's simplicity and comfort, as well as for its complexities I still aim to recreate. Although I can't re-live my childhood, I have to admit that when I now make my own homemade pasta sauce, I have an ulterior motive: to fill my apartment with the equally enticing smells that wafted from my mother's pot and filled our Connecticut home. I admit to taking the dog out as my sauce cooks simply so I can enter again, inhaling deeply, testing my own ability to reproduce a smell as delicious and inviting as that from years ago... Who knows, maybe someday my children will feel the same about this sauce as I do about the one that brought our Italian family around the table for yet another Thursday night dinner together.

    Spicy and Sweet Pasta Sauce
    Ingredients:
    2 28 oz. cans crushed tomatoes
    1 can tomato paste
    1 medium to large white or Spanish onion
    4 cloves garlic
    2 T olive oil
    1 to 2 T red pepper flakes
    2T sugar or 3 T. grape jam (mom would cringe, we never kept grape jam!)
    fresh chopped or dried basil, oregano, thyme, salt, and pepper to taste
    *optional, reserved pasta cooking water to thin

    Directions:
    In a large saucepan, set the olive oil over medium heat. Meanwhile, finely chop the onion and garlic. Add the onion to the saucepan and stir with a wooden spoon. Allow to cook until golden and soft, approx. 6 minutes. Turn the heat down slightly. Add the garlic and cook, stirring, about two more minutes. Next, add the tomato paste and stir to coat the onion and garlic. Add both cans of crushed tomatoes, the sugar or jam, crushed red pepper, and Italian seasonings. Simmer on low for as long as desired, partly uncovered. Salt to taste. If desired, thin the sauce out with a little bit of cooking water from the pasta. The starches in the water bring flavor to the sauce without diluting it.

    The crushed tomatoes that are used in this recipe make for a fabulous combination of both chunky and smooth sauce that truly sticks to every bite. However, if you hate chunks, feel free to use tomato puree. Then, if you're my mother or me, load twice as much sauce onto your plate as you have pasta and enjoy!


    May 19, 2010

    Bean Burgers

    BEEFY. without the beef.

    These bean burgers are so hearty and satisfying, you won't miss meat for a moment. Not only that, but you'll likely never purchase a frozen pre-made veggie burger ever again. These are a snap to make and quick to cook. The result is a fresh, savory patty with a crispy outside and soft inside that you can load up with your favorite toppings.

    Here, I spread a bright and citrusy guacamole hummus on the top bun (green in the photo) and spicy black bean spread that has an addicting, slightly sour tang on the bottom bun (brown in the photo). Generous layers of freshly sliced ripe avocado peep out from underneath the gigantic burger patty. Before serving, I topped each burger with a few tablespoons of salsa.

    Other great additions are sour cream, chipotle mayo, lettuce, onions, cheese... you name it and it's good on this burger.

    Black Bean Burgers
    Ingredients: Makes 4 Patties
    1 can red kidney beans, rinsed and drained
    1 can black beans, rinsed and drained
    1 cup whole wheat breadcrumbs
    1 egg
    1/2 diced onion
    2 T mayo (light or regular)
    1 T. cumin
    1 T oregano
    1 T chile powder
    1 t. salt
    1 t. garlic powder
    a few dashes of hot sauce
    * these ingredients (type of beans, amount + type of spices) can be changed to suit your tastes.

    Directions:
    Food process the kidney beans, half the can of black beans, and the spices. Spoon into a bowl and mix with the breadcrumbs, mayo, egg, and onion. Stir in the rest of the black beans. Meanwhile, over medium heat, heat a large, lightly oiled pan or skillet. Shape the bean mixture into four round patties, approximately 3/4 inch thick. Place on skillet and do not move them for a few minutes, then check gently underneath to see if they have formed a brown crust. If so, flip to them over and cook on the other side.

    Serve on soft, warmed buns with toppings of choice.

    May 18, 2010

    Whole Wheat Breadcrumbs

    Since many of my recipes call for whole wheat breadcrumbs, here is the pitifully simple way that I make them. I keep a bag of them ready to use in my freezer at all times.

    Take the ends of a loaf of whole wheat bread (I use these because usually they are the rejects nobody wants to make a sandwich with) or regular sliced whole wheat bread. Toast the slices lightly in the toaster or layed out under the broiler in the oven. Take care not to burn them, but to lightly brown each slice on both sides.

    Then leave them to cool and dry on racks in the kitchen overnight or just for a few hours. Tear them into pieces and food process them into crumbs. Store for later use in the freezer.

    Spanish Rice

    Here is the recipe for spanish rice, which I paired with the tuna steaks with peanut chile salsa:

    Ingredients:
    1 c. brown rice
    2 t. olive oil
    2 t. tomato paste
    2 c. chicken or vegetable stock
    1 medium spanish onion, diced
    1 clove garlic, diced
    1 t. dried oregano
    1 t. cumin
    1 t. red pepper flakes
    1 t. chile powder
    salt to taste
    dash of hot sauce, optional

    Directions:
    In a medium saucepan, heat 2 t. olive oil over medium heat until it shimmers. Add diced onion and saute, stirring occasionally, until just golden brown (approx. 6 minutes). Add the brown rice and stir for approx. 1 minute, then add the garlic and stir for another minute, or until the rice is lightly toasted and gives off a nutty aroma. Take care not to burn the rice, turn down your heat if you need to. Next, add the tomato paste and stir to coat the rice. Pour in the chicken stock and bring to a boil, then reduce to a simmer. Simmer for 30-35 minutes or until the rice is just tender. Add oregano, cumin, red pepper, and chile powder. Stir to combine, salt to taste, and add a dash of hot sauce for flavor and heat.

    Serve with fish or enchiladas.

    Tuna Steaks with Peanut Chile Salsa

    The peanut chile sauce of Sunday night needed an appropriate home... a vehicle for consumption that would be hearty yet still let the spicy, nutty "salsa" stand out. I chose wild-caught tuna steaks, conveniently purchased frozen, two to a pack from Trader Joe's. After allowing them to thaw overnight in the fridge, I was ready to get cooking.

    After rinsing each steak and patting them dry, I ground fresh black pepper onto each side (press in gently to make it stick). I then transferred them into my lightly oiled grill pan, which had been pre-heating on medium for a few minutes. Once the steaks are down, do not move them for 4-6 minutes. This allows the grill marks to form. Using tongs, gently turn the steaks over after four minutes for a lightly pink center and six for well-done.

    In my case, I had some leftover escarole sauteed in olive oil and lemon, as well as some diced potatoes and spanish rice. I added these to heat up on my grill pan while my steaks were cooking. Meanwhile, I re-heated my peanut chile salsa in the microwave in a small bowl. Once I plated everything, I poured a small amount of the sauce over each tuna steak, then brought the rest to the table for extra helpings (the more sauce, the better!). This combination of tuna and sauce, with the rice to help soak it up, was perfection on a plate.


    May 17, 2010

    Dark Chocolate Chunk Muffins

    with Honey Pecan Cream Cheese.

    Once again, I found myself staring into the pantry at a box of cereal I had been forcing myself to eat with milk: Grape Nuts. What else could I do with Grape Nuts that did not involve milk and a spoon, I wondered? The answer: low-fat Grape Nuts muffins.

    Since muffins are a great vehicle for creativity, I like to toss in everything but the kitchen sink when I'm baking a batch. In this case, I added chopped 72% dark chocolate chunks and topped each muffin with a tablespoon of honey pecan cream cheese and a pecan.

    These are great to eat warm out of the oven, but they were also delicious on their own later on when I brought them outside for a picnic. Since there is a cream cheese filling, it's almost as if each bite comes with a built-in topping... no toaster, knife, or jar needed!

    Dark Chocolate Chunk Muffins with Honey Pecan Cream Cheese

    INGREDIENTS
    1 cup Grape-Nuts Cereal
    1 cup fat-free milk
    1-1/4 cups flour
    1 Tbsp. baking powder
    1 tsp. ground cinnamon
    1/2 tsp. salt
    1 egg
    1/2 cup chunky applesauce
    1/2 cup firmly packed brown sugar
    1/2 cup chopped dark chocolate
    Whole pecans
    Plain cream cheese mixed with honey and pecans, to taste
    2 Tbsp. margarine, melted

    DIRECTIONS
    Preheat oven to 400ºF. Combine cereal and milk; let stand 3 min. Meanwhile, mix flour, baking powder, cinnamon and salt in large bowl; set aside. Beat egg in medium bowl. Add applesauce, sugar, raisins and margarine; mix well. Stir in cereal mixture until well blended. Add to flour mixture; stir just until moistened. (Batter will be lumpy.) SPOON evenly into 12 (2-1/2-inch) muffin cups sprayed with cooking spray, filling each cup two-thirds full. Scoop one tablespoon of honey pecan cream cheese into the center of each batter and press down gently to almost completely submerge. Press one pecan next to the cream cheese. Bake 20 min. or until wooden toothpick inserted in centers comes out clean. Cool in pan 5 min. Remove to wire rack; cool slightly. Makes 1 dozen muffins.


    Carrot Cake: America's Test Kitchen


    All credit goes to my friend Rob for baking this delicious carrot cake on Saturday evening. The recipe is from America's Test Kitchen, and it was definitely a success. Lots of plump and juicy raisins, the toasty crunch of walnuts, and sweet carrots were layered with a unique cream cheese frosting that includes sour cream. The result is a perfectly thick, not too sweet frosting with an ever-so-slight tang. Addicting. Rob decorated the top of the cake with a ring of chopped crystallized ginger that was not only pretty, but a delight to eat!

    RECIPE INGREDIENTS
    For the Carrot Cake:
    2 1/2 cups unbleached all-purpose flour (12 1/2 ounces)
    1 1/4 teaspoons baking powder
    1 teaspoon baking soda
    1 1/4 teaspoons ground cinnamon
    1/2 teaspoon ground nutmeg
    1/8 teaspoon ground cloves
    1/2 teaspoon table salt
    1 pound medium carrots (6 to 7 carrots), peeled
    1 1/2 cups granulated sugar (10 1/2 ounces)
    1/2 cup light brown sugar packed
    4 large eggs
    1 1/2 cups vegetable oil or safflower, or canola oil
    For the Cream Cheese Frosting:
    8 ounces cream cheese softerend but still cool
    5 tablespoons unsalted butter softened, but still cool
    1 tablespoon sour cream
    1/2 teaspoon vanilla extract
    1 1/4 cups confectioners' sugar (4 1/2 ounces)

    DIRECTIONS
    FOR THE CAKE:
    Adjust oven rack to middle position; heat oven to 350 degrees. Spray 13 by 9-inch baking pan with nonstick cooking spray. Line bottom of pan with parchment and spray parchment.

    Whisk together flour, baking powder, baking soda, cinnamon, nutmeg, cloves, and salt in large bowl; set aside.

    In food processor fitted with large shredding disk, shred carrots (you should have about
    3 cups); transfer carrots to bowl and set aside. Wipe out food processor workbowl and fit with metal blade. Process granulated and brown sugars and eggs until frothy and thoroughly combined, about 20 seconds. With machine running, add oil through feed tube in steady stream. Process until mixture is light in color and well emulsified, about 20 seconds longer. Scrape mixture into medium bowl. Stir in carrots and dry ingredients until incorporated and no streaks of flour remain. Pour into prepared pan and bake until toothpick or skewer inserted into center of cake comes out clean, 35 to 40 minutes, rotating pan halfway through baking time. Cool cake to room temperature in pan on wire rack, about 2 hours.

    FOR THE CREAM CHEESE FROSTING:
    When cake is cool, process cream cheese, butter, sour cream, and vanilla in clean food processor workbowl until combined, about
    5 seconds, scraping down bowl with rubber spatula as needed. Add confectioners' sugar and process until smooth, about 10 seconds.

    Run paring knife around edge of cake to loosen from pan. Invert cake onto wire rack, peel off parchment, then invert again onto serving platter. Using icing spatula, spread frosting evenly over surface of cake. Cut into squares and serve. (Cover leftovers and refrigerate for up to 3 days.)

    Recipe reprinted by permission of America's Test Kitchen. All rights reserved.

    Peanut Chile Salsa

    When I was at DiBruno's Market in Philadelphia yesterday, the vine-ripe tomatoes smelled so sweet and looked so fresh that I had to buy a couple of pounds. When I got home, I knew exactly what I would do with them... Convert them to a rich, nutty and spicy sauce I had seen recently in the New York Times Recipes for Health. The recipe requests Roma tomatoes and spicy chiles, neither of which I exactly had on hand. So I broiled my tomatoes on the vine and used a few dashes of hot sauce and half of a jalapeno instead for a kick. Made almost creamy by the pureed peanuts, this thick salsa begs eating by the spoonful. This is a serious sauce that will stick with love to whatever it's poured over... namely, the seared tuna steaks I have waiting in the fridge for tomorrow night...

    Peanut Chile Salsa

    Ingredients:
    1 tablespoon mild ground chili powder or 6 de arbol chiles
    1 1/4 pounds tomatoes, preferably roma tomatoes
    1 plump garlic clove, skin on
    1/2 to 1 teaspoon ground cinnamon, preferably Mexican
    1 clove
    1/2 teaspoon dried oregano, preferably Mexican
    1/2 cup roasted unsalted peanuts
    1 1/2 tablespoons canola oil
    About 2 cups chicken or vegetable stock
    Salt to taste

    Directions:
    1. If using the dried chiles, heat a dry skillet or griddle over medium heat, and toast the chiles just until they change color — a few seconds on each side. Remove from the heat, and place in a bowl. Cover with hot water, and place a saucer on top to keep them submerged. Soak for 15 minutes. Drain and remove the stems.

    2. Meanwhile, preheat the broiler. Cover a baking sheet with foil, and place the tomatoes on top. Place under the broiler a couple of inches from the heat. Broil until blistered and charred on one side, five to six minutes. Using tongs, turn the tomatoes over and repeat on the other side. Remove from the heat, and allow to cool until you can handle them, then cut away the core and transfer to a blender.

    3. Meanwhile, heat a dry skillet over medium heat, and toast the garlic, turning often, until it smells toasty, has softened and is colored in spots. Remove from the heat. Remove the skin and trim away the root end. Add to the blender, along with the cinnamon, clove, chili powder (or the stemmed, soaked chiles), oregano and peanuts. Blend to a purée, adding a little stock if necessary.

    4. Set a large, heavy saucepan over medium-high heat, and add the oil. When the oil is hot and a small amount of the purée sears when you add it to the pan, add all of the purée. It will splatter, so have a lid close by. Cook the purée, stirring constantly, until it thickens and darkens, five to eight minutes. Add the remaining stock, and combine well. Bring to a boil, and reduce to a simmer, stirring often, until the sauce has thickened and darkened, eight to 10 minutes. Season to taste with salt. The salsa should be thick. Remove from the heat, and serve hot or warm, with grains and vegetables (or with fish).

    Yield: Makes 1 3/4 cups, serving about six.

    Advance preparation: The salsa keeps well for several days in the refrigerator and freezes well. Reheat and stir after thawing.
    Recipe from Martha Rose Shulman's 'Recipes for Health'


    May 14, 2010

    Hot Shredded Wheat


    Hot Shredded Wheat -- A surprisingly delicious alternative to morning oatmeal.

    I had been eying the box of Kashi Autumn Wheat cereal in my pantry for months. As far as cereal in milk goes, shredded wheat types are not my idea of tons of fun in a bowl. So I tossed some wheats in my cereal bowl, covered with skim milk, a sliced banana, and some cinnamon and microwaved on high for two minutes. The result was a delicious hot breakfast that I gladly substituted for my daily morning oatmeal (and that's saying a lot, since nothing makes me take a break from my banana oatmeal)!

    Heating the cereal had brought out the subtle sweetness of the grains, made even sweeter by the hot banana. This was well-balanced by a generous dash of cinnamon, but would have also been great topped with some chopped nuts, or mixed with peanut butter, raisins, or dried cherries.

    Enjoy!

    Apple Walnut Sour Cream Pie


    This pie is simply out of this world. A co-worker provided me the recipe, promising that it was unique, delicious, and most importantly, worth the effort! Rather than baking a traditional apple pie or crumble, I decided to tackle this one. It's like a pie and a crumble, a sweet, savory and a sour all in one: a real tin full of sin.

    The topping is a crunchy layer of walnuts, brown sugar, and cinnamon that does everything it can to hide what lies beneath... hoards of thinly sliced, tender and sweet apples in a perfectly balanced filling of lemon, sour cream, and natural juices. The sour cream plays the role of the best supporting actor, never taking center stage over the simple delight of this special nutty apple crumble, yet gently prompting every flavor forward to shine on its own. And underneath it all, the perfect buttery pie crust, just for good measure.

    In the oven as it baked, the filling oozed out from underneath the topping, pouring onto the pan and creating a hot brittle that was the grand prize for this baker to eat when it finally came out! This pie is a winner on all accounts.

    Sour Cream Apple Pie: courtesy of Evelyn Coleman, Laverock, PA via Evelyn Olivieri
    Makes two pies
    Filling: 
    8 oz. carton sour cream
    8 oz. package cream cheese
    1 egg
    1.5 cups sugar
    1/4 cup flour
    2 T vanilla extract
    1/2 t. salt
    6-9 large cooking apples, sliced
    2 (9-inch) pastry shells

    Topping: 
    1/2 cup butter or margarine
    1/2 cup flour
    1/2 cup sugar
    1/2 cup firmly packed brown sugar
    1 T. cinnamon
    1/4 t. salt
    2 cups chopped walnuts

    Filling: Combine sour cream, cream cheese, egg, sugar, flour, vanilla and salt in a large bowl. Beat until mixture is well blended. Add sliced apples to mixture (paring and slicing apples into cream mixture helps to delay browning), stirring to coat. Pour filling mixture into pastry shell(s) and bake at 350 degrees for 40 minutes until cream mixture is firm.

    Topping: Blend together butter, flour, sugars, cinnamon, salt and walnuts. After pie is baked, remove from oven and stir top of filling gently. Place topping mixture evenly over top of pie. Return to oven for 15 minutes more.

    Pumpkin Cake with Orange Cream Cheese Frosting


    I know, I know. It's the wrong season for pumpkin cake (though it is never the wrong season for cream cheese frosting!). I simply could not help sharing an old creation: a four-layer pumpkin cake with orange cream cheese frosting. It's secret ingredient, Chinese five-spice, adds a mysterious kick to every bite, its spicy notes balanced by the sweet tang of orange in the cool cream cheese frosting. This cake is a real winner, as well as a sure bet to impress a crowd of guests!


    Four-Layer Pumpkin Cake with Orange Cream Cheese Frosting

    Cake:

    * Nonstick vegetable oil spray
    * 3 cups all purpose flour
    * 2 teaspoons baking powder
    * 1 teaspoon baking soda
    * 1 teaspoon Chinese five-spice powder*
    * 1/2 teaspoon fine sea salt
    * 1 cup (2 sticks) unsalted butter, room temperature
    * 2 cups (packed) golden brown sugar
    * 3 large eggs, room temperature
    * 1 15-ounce can pure pumpkin
    * 1/3 cup whole milk

    Frosting:

    * 1 cup (2 sticks) unsalted butter, room temperature
    * 2 8-ounce packages cream cheese, room temperature
    * 1 tablespoon finely grated orange peel
    * 2 cups powdered sugar, sifted
    * Chopped walnuts or walnut halves, toasted

    For cake:
    Position rack in bottom third of oven; preheat to 350°F. Spray two 9-inch cake pans with 1 1/2-inch sides with nonstick spray. Line bottoms with parchment; spray parchment.

    Whisk flour and next 4 ingredients in large bowl. Using electric mixer, beat butter in another large bowl until smooth. Beat in brown sugar. Add eggs 1 at a time, beating to blend between additions. Beat in pumpkin. Add dry ingredients to butter mixture in 3 additions alternately with milk in 2 additions, beating to blend between additions. Divide batter between pans.

    Bake cakes until tester inserted into center comes out clean, about 40 minutes. Cool in pans on rack 15 minutes. Run knife around cakes to loosen. Invert cakes onto racks. Remove parchment. Using tart pan bottom as aid, turn cakes over onto racks, top sides up, and cool completely. DO AHEAD: Can be made 1 day ahead. Wrap cakes in plastic and store at room temperature.

    For frosting:
    Using electric mixer, beat butter in large bowl until smooth. Add cream cheese and orange peel; beat until smooth. Add powdered sugar and beat on low speed until smooth.

    Trim rounded tops from cakes. Using long serrated knife, cut each cake horizontally in half. Place 1 cake layer, cut side up, on large platter. Spoon 2/3 cup frosting atop cake in dollops; spread to edges. Repeat 2 more times with cake and frosting; top with remaining cake layer, cut side down. Spread remaining frosting over top and sides of cake (layer will be thin). DO AHEAD: Can be made 2 days ahead. Cover with cake dome; chill. Let stand at room temperature 1 hour before serving.

    Decorate cake with walnuts and serve.

    * A spice blend that usually contains ground fennel seeds, Szechuan peppercorns, cinnamon, star anise, and cloves; available in the spice section of most supermarkets.
    Recipe taken from November 2009 Bon Appetit

    Milk N' Cookies


    Recently, I went to Milk n' Cookies, an adorable homemade ice-cream-sandwich shop in the West Village in New York City. As you can see from the photo, these sammies are huge in proportion to our hands! But somehow we managed to consume them all. Cookie flavors, which are all fresh baked on the premises, included double chocolate chunk, peanut butter chocolate chunk, sugar, chocolate chip, and toffee, just to name a few.

    Smoosh a generous couple of scoops of dark chocolate, strawberry, vanilla, or mint ice cream in the middle, and you have yourself heaven. In this case, there was a special amaretto crunch gelato offered that day, and we all had this delicious flavor wedged between our cookie choices.

    Milk n' Cookies makes other delectable treats, such as a the "Nutter Butter" sandwich cookie, which is a peanut butter and oats crumble cookie stuck together with gooey layers of peanut butter and honey. Unreal.

    Links

    Related Posts Plugin for WordPress, Blogger...