Showing posts with label Appetizer. Show all posts

June 23, 2013

Bacon Cheddar Deviled Eggs


 Deviled eggs are making a comeback! I adore eggs in every form, but deviled eggs are a special indulgence due to their extra-rich, creamy filling. For these deviled eggs I stole a note from twice-baked potatoes... that is, take the filling out, whip it together with extra fat (mayo for this, butter for potatoes)... and more fats like cheese and bacon... and then put it back in. This is how the ordinary becomes amazing!


I made these eggs for our book club picnic. We read David Sedaris's "Me Talk Pretty One Day," which is a hilarious compilation of short stories. Since the stories are brief, we made our bites brief, too.

From sliders, to mini pies, to cute little bunches of veggies tied up with a sprig of parseley, all of our menu items were small.

These eggs might be bite sized, but they're certainly not small on flavor! Don't underestimate just how luscious these cheddar-bacon filled deviled eggs are, and plan to make a few for each person you're serving to.


After all, I've never been friends with anyone who would say no to something with bacon and cheese... And since my book club ladies are some of the best, these eggs flew right off the plate and into our laughing, happy, story-telling mouths.

Bacon Cheddar Deviled Eggs: makes 24
1 dozen hard-boiled eggs (directions below)
4 slices bacon, cooked until crisp
1/4 of a medium white onion
1/4 cup mayonnaise
1/4 cup shredded sharp cheddar cheese
1/8 teaspoon paprika, plus more for sprinkling
salt to taste

Directions: To hard boil the eggs, place the eggs in a large pot of water and bring to a boil. Turn off and remove from the heat and allow to stand 12 minutes. Drain the eggs and shake in the pan to lightly crack the shells (this allows the cold water to get under the shells and aids with peeling). Fill the pan with cold running water for 2 minutes. Peel all of the eggs and set aside.

Cut each egg in half and gently remove the yolk with a small spoon. Add the white onion, mayo, and sharp cheddar to the food processor and process for a minute. Add the paprika and yolks and process until very smooth. Salt to taste. Crumble 3 bacon slices and stir into the yolk filling. Use a frosting piping bag to pipe the bacon cheddar filling back into each egg half. Crumble or slice the last bacon piece into 24 small pieces. Add a small bacon piece to the top of each egg mixture and gently sprinkle with the remaining paprika.

Chill. Can be made 4 hours ahead.

March 10, 2013

Homemade Soft Pretzels


I might not believe someone if they told me these soft-baked pretzels were super easy to make. I might think, Who makes soft-baked pretzels unless they have an inordinate amount of time on their hands? 

I'd probably be super skeptical of the whole thing, though very interested. But since I made these soft, chewy, salty pretzels myself for our German-inspired book club menu, I can vouch first-hand that they are in fact simple, streamlined, and quite easy -- so, listen up beginner cooks!

For all the writing and talking I do, it's surprising that I'm actually a "show, don't tell" type of learner. I'd rather see what I'm getting into before diving into the task, so I'll do the same for you here. You'll see how easy it really is to make these soft-baked pretzels. The only thing I can't share with you first-hand is the scrumptious and warm end result!

So gather all your ingredients....


Test that water temperature to be about 115 degrees....
I've killed yeast too many times for that!


Add the water, sugar, and kosher salt in the mixing bowl and stir to combine, then pour the yeast on top. 


Add the flour and butter and let the dough hook do its work. 
Put away you ingredients in the meantime. Hum a tune. Wipe your counter.

When that dough is nice and smooth, take it out of the bowl, spray the bowl with cooking spray, return it to the bowl and cover it to let it rise in a warm place.


Get ready for the fun part!!

Divide that dough up into 16 pieces, then roll each piece out into a rope and cross each end over each other to make cute little pretzel bows. 

Guess what? It doesn't matter if they're not perfect. Or if they're pretzel nuggets, rolls, or rods instead.

I put mine on a baking sheet and froze since I wouldn't be baking them until a couple days later. Once they were frozen on the sheet I piled them all into a plastic freezer bag, but you can just skip that step and put them straight onto an oiled baking sheet instead. 


Preheat your oven to 450.... Get your egg wash ready and your Kosher salt on the side....

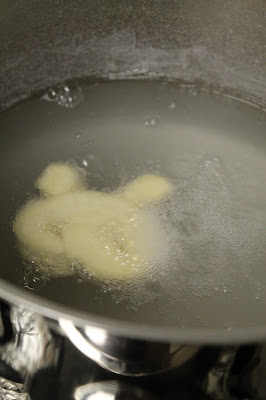
Pour 2/3 cup baking soda into 10 cups of boiling water. Check out that crazy foam!!


Drop those pretzel babies into the bath one at a time! All right, I admit my impatience made me do it two at a time.

Once they float to the top, rescue them back onto the baking sheet.


Once they're all out of the bath and back on the baking sheet, work your egg wash magic and sprinkle with salt.


Bake for 15-18 minutes or until deep golden, or looks like the picture below....

Cool on racks for 5 minutes before gorging on them while they're still hot!


See, you can do it, too! It's well worth the effort (pretend it was very involved and arduous, and you'll impress your friends and family to no end).

Maybe you'd like some spicy brown mustard with that? Cheese dip? Pants with an elastic waistband?
I'd recommend being prepared with all of the above.


Homemade Soft-Pretzels: makes about 16 palm-sized knots.
Ingredients:
1.5 cups water, warmed to about 115 degrees
1 T. sugar
2 t. kosher salt
1 package active dry yeast
4.5 cups all-purpose flour
2 oz. butter, melted
Vegetable oil spray
10 cups water
2/3 cup baking soda
1 large egg yolk, beaten
extra kosher salt

Directions:
Combine water, sugar, and kosher salt in the bowl of a standing mixer with dough hook attached. Stir to combine, then add the yeast on top and allow to foam, about 5 minutes. Add the flour and butter and mix on low speed until well combined.

Change to medium speed and knead until smooth and pulling away from sides of the bowl, about 5 minutes. Add more flour, 1 T. at a time, if the dough seems too sticky. 

Remove the dough from the bowl, spray the bowl with cooking spray, and return the dough to the bowl. Cover with plastic wrap and allow to rise in a warm place for about an hour or until doubled in size.

Preheat oven to 450 and line 2 baking sheets with parchment paper. Lightly spray with cooking spray. 

Bring 10 cups water to a rolling boil. In the meantime, divide the dough into 16 pieces and roll into a long rope. Hold each end of the rope and cross them over each other to create a pretzel knot. Press the center of the knot to adhere dough and ensure it keeps its shape in the boiling water. Place on the baking sheet, and repeat until all 16 are created. 

Pour 2/3 cup baking soda into the boiling water, then add the pretzels 1-2 at a time. Remove from the water after 30 seconds or it rises to the top. Return to the baking sheet. Brush each pretzel with egg wash and sprinkle generously with salt.

Bake for 15-18 minutes, turning to evenly brown if necessary. Cool 5 minutes on a wire rack, then enjoy! Best eaten immediately, but if you must store them do so in a brown paper bag. 


January 25, 2011

For the gluten-free and gluten-loving alike: Farinata (Chickpea Flatbread)


Farinata is the answer to a snack attack for something warm and soft.


And it is gluten free! 
These little chickpea flatbreads are amazingly comforting, 
authentic, and ridiculously easy to make. 

They're much softer than a cracker, and more moist than bread. 
Every slice is reminiscent of rich, buttery, thin slices of cornbread. 
Except that it's not cornbread, and there's no butter.

Trust me, you'll want to make these just so that you can top them
any way you like. Mine have sage, garlic powder, and pepper. 

Then I served them with a choice of pesto or walnut feta spread. Yum.


Ingredients:
2 cups chickpea flour
1.5 cups cold water
2 t. salt
1/3 cup quality olive oil
Toppings of choice: 
think dried or fresh herbs, pepper, spices, 
even crumbled or shredded cheese

Directions
In a large bowl, slowly whisk the chickpea flour into the water.
Whisk in the salt and oil. 
Cover with plastic wrap.
Allow to sit at least 1 hour, and (chilled) up to a day.
Preheat broiler and stir batter once more. 
Coat a 9x13 inch pan with olive oil 
and pour in the batter, 
then evenly sprinkle on your toppings.
Broil 5 minutes, then turn on oven to 450
and bake for another 5 minutes more, 
until the edges pull away from the pan. 
Slice, and serve
steaming hot!

January 21, 2011

Creamy White Bean Hummus

Brightly flavored, hearty, and healthy:


I love the silky, yet thick, texture of this white bean hummus. It is wonderfully versatile and quick to make. Whether served as an appetizer with crunchy red pepper strips and crackers, or smothered on a lunch sandwich, it's one recipe that should be kept close by!

Ingredients:
1 15oz. can cannelini beans, drained
2 t. fresh lemon juice
1.5 T. extra virgin olive oil
1 large garlic clove, peeled
3/4 t. ground cumin
1/2 t. dried parsley
1 T. fresh chopped basil
1 t. grated lemon peel
1/2 t. hot pepper flakes

Directions: Add all ingredients in a food processor and process until smooth.

November 21, 2010

Arancini (Fried Risotto Balls)


Crispy on the outside, but steaming hot and creamy on the inside, these risotto balls are a uniquely delicious treat.

Ingredients:
Approx. 3 cups cold leftover prepared risotto
1 package goat cheese, crumbled
1 cup all-purpose flour
2 large eggs, beaten
1 cup fine dry breadcrumbs (I used a 1:1:1 ratio of cornmeal, panko breadcrumbs, and regular breadcrumbs for extra crispy texture)
vegetable oil for frying

Directions: In a large bowl, stir together the risotto and goat cheese until well incorporated. Place the flour, eggs, and breadcrumbs into separate bowls. Using wet hands, roll a generous spoonful of risotto into a ball, then roll first in the flour, shaking off excess, then the egg, letting excess drip off, then finally in the breadcrumbs. Transfer to a plate as you do this with all of the risotto. Heat about 1-2 inches of oil in a saucepan over medium-high heat and drop in 4-5 of the rice balls at a time. Cook, rotating, until the balls are crispy on each side. Remove with a slotted spoon onto a paper towel and allow to drain, then serve immediately or keep warm in a 300 degree oven as you finish frying the entire batch. Serve with red sauce or pesto.

November 12, 2010

Spicy Pumpkin, Yam & White Bean Dip


On Wednesday I shared the recipe for the sweet variation of this spicy pumpkin, yam, and white bean dip. The sweet dip's mischievous twin brother, spicy dip, packs a punch of heat and savory spices for a really addicting appetizer. Serve with homemade crunchy Parmesan toasts.

Spicy Pumpkin, Yam & White Bean Dip:
Follow directions for Sweet Pumpkin, Yam & Bean Dip through the Basic Dip recipe. Then:

Add:
1/2 t. cumin
1/2 t. cayenne pepper
1 t. hot sauce
1/2 t. red pepper flakes
salt to taste

Process together until combined, and serve with toasts:

Crunchy Parmesan Toasts: Preheat oven to 350 degrees. Cut 5 large slices of Tuscan pane or sourdough loaf into 1" triangles. Place in a large bowl. Melt 1/4 cup butter over medium heat in the microwave, then slowly pour the butter over the bread as you toss the bread to ensure that each triangle gets some butter. Next, toss with 2 T. grated Parmesan cheese and 1/2 t. salt. Gently spread the triangles out on a baking sheet and bake for 10 minutes in the oven, or until turning golden brown, then turn each piece over and bake on the other side until golden brown. Cool completely either in the oven or on the sheet.

November 10, 2010

Sweet Pumpkin, Yam & White Bean Dip


It's book club night and we're all bringing our favorite fall dishes. This pumpkin, yam, and white bean dip is not one of my favorite fall dishes, in fact, I just made it up. But I absolutely adore pumpkin and yams during these holiday months and wondered how I could create an appetizer out of these two flavors. Thus, two dips were born: sweet pumpkin and yam dip, and spicy pumpkin and yam dip. The flavors in them are different but the base is the same: I simply divided the dip once the base ingredients had been combined, then altered them separately to create two variations. I'll post the spicy dip later, which is scooped up with homemade Parmesan toasts.

This sweet version has undertones of maple and pumpkin pie spice, and is served with homemade cinnamon raisin bagel chips. I can't wait to sample all of the wonderful dishes that the rest of the club is making, but with heaping bowls of both of these flavorful and interesting dips as appetizers, I'm sure that we'll be well on our way to fulfilling our Fall cravings right from the start.

Sweet Pumpkin, Yam & White Bean Dip:
For the white beans:
Overnight, soak 2 cups white beans in 6 cups of water. Rinse and drain, then bring to a boil with 6 cups of water, 2 T. olive oil, 1 t. dried sage, and 3 cloves of garlic. Reduce to a simmer and cook for 1.5 hours. Then, add freshly ground pepper and a dash of salt, stir, and simmer for another 30 minutes until tender. Drain the beans, reserving the cooking liquid in case you need it later.

For the basic dip:
2 pieces white or sourdough bread, crusts removed
1/3 cup heavy cream (or whole milk, if desired)
2 cups white beans as prepared above, or 2 cans white beans (rinsed and drained)
2 cloves garlic
2 T. olive oil
1 T. lemon
1/2 cup pumpkin puree (not pie filling)
1/2 cup or more canned yams in light syrup, drained
dash of salt

In a food processor, add the bread and heavy cream, process together until combined. Add the rest of the ingredients and process until smooth, then reserve half in a separate container if desired, for the Spicy Dip.

Add to processor and process 1 minute:
1 t. pumpkin pie spice
1 t. maple syrup
salt and pepper to taste

Enjoy with your favorite pita chips, crackers, veggies, or homemade bagel chips.

October 10, 2010

Roasted Garlic


The simple act of roasting an entire head of garlic in olive oil and a bit off salt  is wonderful. Every clove holds a soft, spreadable, completely mild scoop of garlic, perfect for slathering onto crusty Italian bread, or, as in our case, the crusts of our deep dish pizza. 

Simply peel a head of garlic to remove the outer layer, keeping it intact. Chop the tip of each clove off, to expose the bulb. Place the head of garlic in a piece of tin foil, then pour a tablespoon or so of olive oil over the garlic head and sprinkle with sea salt. Close the tin foil, wrapping it completely, then bake in a 350 degree oven for 30-40 minutes until soft. Each clove of garlic will slide right out of its casing when pulled gently with a small spoon.

October 3, 2010

Last week's bagels, this week's snacks


I really don't like wasting food. Something about it feels terribly wrong to me. I'm not sure where this outlook came from, but most people who know me know that I'll do anything possible to avoid wasting food. Perhaps this tendency for rescuing rejected food is the same one that has caused me to rescue every homeless animal I've encountered throughout my life (guinea pigs, cats, dogs, even chickens)... Both food and animals can't control whether they're about to get dumped. What a helpless state to be in! I'm always certain that these about-to-be abandoned things, whether a furry mammal or a bowl of pasta leftovers, has more ahead of it than its impending end. 

Sure, sometimes I get made fun of for it, but I have to say that my dislike for wasting food has led me to find many ways to reinvent a variety of food items into something new and appealing rather than relegate it to the garbage. It always ends up well, just like all those animal adoptions.

Take these bagel chips, for example. Last week's surplus of bagels led to this week's crunchy and abundant snacks.


As my bagel chip treats baked away in the oven I couldn't help but feel, as I always do when I use something instead of throwing it out, like I had done my little part to stop just a small bit of the crazy amount of wasting that goes on. Upon first bite there was no memory that these had ever been last week's bagels -- they had been given new life with just a brush of butter and sprinkles of seasoning.

Thinly slice your stale (or fresh!) bagels, then brush them lightly on one side with melted butter and the spices of your choice. In the above pictures, sesame seed bagels got tossed with garlic powder and a dash of salt, and cinnamon raisin bagels were sprinkled with Splenda and a bit of pumpkin pie spice. Preheat the oven to 350 and bake the bagel slices on baking sheets for about 15 minutes until lightly browned and crispy, turning to the other side halfway through and brushing with a bit more butter. 

Eat plain as a snack, or serve the savory chips for dipping with guacamole or hummus, and the sweet chips dipped in Nutella or peanut butter. Being un-wasteful never tasted so yummy... After all, why should the garbage get all the good stuff?

September 30, 2010

Grandma Wicks's Walnut Pate


It's nutty, it's toasty, it's salty, its garlicy. It's completely and utterly addicting.

I was first introduced to this walnut spread last winter by Camille, my friend and fellow food enthusiast. It was one of the many nights when both of our Matthews were on call at the hospital, and rather than each spend the evening alone, she and I had gotten into the practice of spending it cooking together. Those evenings were often our little forum for trying out new recipes. Around that time Camille had become experimental with bread baking. She was regularly producing fantastic, rustic, and hearty loaves. 

That night, as our dinner baked away in the oven, she presented her most recent loaf: a large and beautiful round boule with picture-perfect cracks spread out from the center of its crunchy outer crust; the interior of which was light, spongy, and as soft as butter. She put it on the table with a big bread knife, a small butter knife, and a curious brown topping in a small plastic container. I hesitated. "It's walnut spread," she explained. "My grandma used to call it walnut pate. It's kind of addicting." 

Clearly, Camille's kitchen talents are genetic: her grandma Wicks was a lifelong cook who taught high school home economics and had her own cooking-class business. She even authored a food processor cookbook that Camille uses regularly, which was sold at Sears when the food processor first came out in the 70s. Pretty neat, huh?

Anyway, I can't say that she didn't give me fair warning. Even though the bread-making phase has come and gone , this walnut spread is definitely here to stay, and I'm so glad that it was passed on to me, too. I am fairly certain that Camille had to coax the tub of walnut pate from my loving hands so that we could finally sit down to our actual meal. I was, and still am, in love at first bite.

Since Camille is hosting our book club's potluck dinner tonight, it occured to me to whip up a batch of her walnut spread last night. I was suddenly struck by a craving for this nutty and intensely flavorful treat, and since it's ready in a matter of minutes, that craving was satisfied fast. Although it's wonderful eaten on baguette, in sandwiches, or with crackers, I tossed half of my batch with pasta and vegetables to create last night's dinner of capunti with a creamy walnut sauce. I'll post that recipe tomorrow, but it was fantastic!

Grandma Wicks's walnut spread is versatile and delicious. Its uses are endless, but only if you are able to keep keep the batch around for long enough to find them all!


Grandma's Walnut Pate: In a food processor or blender, process 2 cloves of garlic with 1 T. salt, then add about 1 to 2 cups of walnuts (I like to lightly toast them first to bring out their flavors). Pulse a few times to incorporate, then turn the blender back on and slowly pour a few tablespoons of olive oil into the top until it forms a thick, chunky walnut spread. Adjust walnut and or garlic to taste.

September 27, 2010

Creamy Cheddar and Corn Bake

I am in need of soft foods. You see, my chin is out of service, making chewing and generally taking normal sized bites a bit challenging.

How the injury happened isn't exciting, and it certainly isn't glamorous. On Friday night I ended up hanging out in the Emergency Room until the wee morning hours because I tripped. Walking. I told you it wasn't glamorous! It was a perfect storm of flip flops + darkness + uneven bricks on the ground = face planting hard. If I weren't in so much pain right now, and if my face were able to form a smile, I'd laugh at myself because it's almost funny to admit the cause of my unsightly stitches and lopsided attempt at getting around.

Anyway, flip flops are evil. This recipe for cheesy, gooey, creamy baked corn dip is not.


What lay beaneath that wonderful golden layer of cheddar crust is absolutely heavenly. It is thick, savory cheese melted together with sweet, juicy corn, waiting to be spooned onto a hunk of lightly toasted baguette. Right now, for me, the best part is that every bite is soft, warm, and comforting, and just what I need in my imapaired state. I am craving a dish that feels like a huge hug, and that makes me want to smile even though I can't.

It's the perfect appetizer for a crowd, which is exactly how it was shared. The picture isn't that lovely and so it doesn't seem like proof that it's entirely delicious... and that's only because shadows were being cast by everyone hovering around waiting to dig in, which, to me, is the best proof of all. 

Cheesy Corn Bake
Ingredients:
Cooking spray
1 can creamed corn
1 can regular corn, gently toasted in a pan until golden
1/4 cup milk
10 oz. cheddar cheese, shredded and divided
1 t. smoked paprika
1 t. salt & pepper each
1 T. dried basil


Directions:
In a 9 by 5 glass baking dish, stir together all of the ingredients, but reserving half of the cheddar cheese. Once it is well incorporated, top the mixture with the rest of the cheddar. Bake at 350 degrees until bubbling and golden. Serve with sliced toasted baguette, crackers, or pita.

September 13, 2010

Beet & Blue Cheese Tart

Hello, feelings of fall. You greeted me with a rainy, cool mid-September Sunday.


And I greeted you with a warm and savory beet and blue cheese tart. 

First I lined the pan with roasted beets, still slightly warm, their deep red staining my cutting board and fingers.


Then I poured on the blue cheese filling. Thick, fresh blue cheese. It smelled pungent and wonderful.

 
Those earthy beets balanced the flavor of the blue cheese with a tender sweetness, like bright sunshine does when it brings warmth to a brisk and cool fall day. 

As it baked, there were incredible smells of sugary pastry and buttery cheese.


The beets had gotten warm and perfectly tender while they hid, nestled underneath a piping-hot blanket of perfectly golden crust.


When I sliced the first slice, I felt myself transition...


... I felt myself slide into the months ahead, with their crisp sunshine and brightly falling leaves.
Slowly, gently, and deliciously with every bite.

Beet and Blue Cheese Tart:
Ingredients:
1 sheet prepared pastry crust or homemade crust
2 medium to large beets, peeled and roasted in olive oil until tender
8 oz. fresh quality blue cheese
2 eggs
3/4 cup milk (I used 1/2 cup cream and 1/4 cup 1%)
1 t. salt

Directions:
Preheat oven to 350 degrees. Lightly grease a 9" tart pan, then lay the pastry filling inside and up the edges, pressing to even out the top edges. Next, slice the beets into 1/4 inch slices and line the bottom of the tart to cover completely, overlapping where necessary. Then, combine the eggs, cheese, milk, and salt in a bowl and pour over the beets. Place tart in the oven and bake for approx. 40 minutes or until evenly golden and bubbly.

July 27, 2010

Leftovers with a New Life: Cheesy Rice Cakes

The plain, white rice 
practically jumped 
out of the Chinese food carton 
and into the pan, 
eager for a new identity.


The truth is, it had been two days since this otherwise bland accompaniment to takeout had been carelessly tossed on the top shelf in the fridge, its more flavorful counterparts having been already consumed. Odds were that it was doomed for the fate of "forgotten, then garbage can".

But why throw out perfectly edible rice? Simple Chinese takeout could become tonight's main Italian event. And it did: with the addition of a couple eggs, a blend of cheese, and aromatic herbs, a new spin on Arancini (those little Italian nuggets of cheesy, ricey goodness) was born within minutes. These cakes, which M and I crafted into entree-sized patties and dipped into tomato sauce, would also be delicious as the side to a tender cut of meat, or served up bite sized for a quick and user-friendly appetizer. Regardless of how these cakes are consumed, it's pretty sweet when last night's leftovers get a second chance as a savory and healthy new item.


Just like a fickle teenager (can we tell I've been in school-counseling class too long?), plain white rice reinvents itself in an instant: with new layers of complexity it becomes worlds more interesting than it was only moments before... and maybe even packs a little attitude, too. 

Italian Rice Patties: (makes 6 entree-sized patties)
Ingredients: 
1 1/4 cup cooked white rice
2 large eggs, beaten
1/2 cup Italian cheese blend (Asiago, Mozzarella, Provolone)
2 T. cream cheese, softened, or Greek yogurt
2 T. Italian seasoning
1 t. salt & pepper each
2 T. olive oil

Directions:  Combine all of the above ingredients, except for olive oil, and mix very well. Cover and place in the refrigerator for two hours to allow the ingredients to thicken and settle. In a large pan or griddle, heat the olive oil over medium heat. When the pan is hot, scoop the rice mixture (using an ice cream scoop or spoon) into a ball and place down in the pan. Press until flat with the back side of a spatula. Allow to cook until sizzling and browned on one side, then flip. Keep patties warm in tin foil in the oven while cooking batches, then serve with hot tomato sauce. 

July 21, 2010

Crispy Tofu.... with Spicy Thai Vegetables

Okay, it's time to be totally honest about last night's dinner. There were parts that I absolutely loved, and there were parts that were forgettable. As in, the recipe card went straight into the garbage afterward.
So, for the sake of focusing on the good, let's separate the two. 

May I present to you my favorite part of last night's dinner: Crispy Tofu


What a fantastic surprise! Tofu that is crunchy, crispy, and slightly spicy. Each little nugget is entirely good enough to eat on it's own. I would happily serve these on a platter, poked with little toothpicks at a party and accompanied by a delicious plum or sweet and sour sauce for dipping.

What we have is cubed firm tofu tossed in a coating of yellow cornmeal, sesame seeds, and cayenne pepper, then gently pan-fried. A tofu treat, sans fat, oil, and a frying pan. In my tofu dreams (in other words, next time I make these) I will substitute the sesame seeds for sweet coconut flakes and have coconut encrusted crunchy tofu. Yummmmmm. 

Now, may I present to you the forgettable element of dinner: Spicy thai vegetables served over rice


I know that I am being far too harsh on these poor vegetables. It isn't their fault that they were included in a recipe not worthy of keeping, and to be fair they were actually somewhat delicious. But their crispy tofu counterpart simply deserved better. I ended up eating the tofu first, then mixing the veggies and rice together afterward. 


Needless to say, either element of this dinner is worth making... on its own. So I'll separate out the recipes below and let you take your pick. Happy stir frying!
  
Crispy Tofu: (serves 2)
Ingredients:
1/2 lb. firm or extra firm organic tofu
1/8 cup yellow cornmeal
2 T. cayenne pepper
3 T. sesame seeds
oil for pan frying

Directions: 
Drain and press the tofu to remove the water. Cut the tofu into 1" cubes. In a separate bowl combine the next three ingredients, then toss the cubed tofu in the bowl to coat thoroughly. Heat 1 T. oil in a large skillet over medium heat. When the pan is hot, place the tofu down and allow to brown on each side for a few minutes, turning over gently on each side. Serve with dipping sauce or on top of noodles.

Spicy Thai Vegetables:

Ingredients: 
1 tablespoon oil
2 tablespoons minced peeled fresh ginger
2 garlic cloves, minced
Frozen stir fry vegetable blend, defrosted
3 tablespoons sesame oil
2 tablespoons soy sauce
2 tablespoons balsamic vinegar
1 1/2 tablespoons sugar
1 tablespoon (or more) hot chili oil
1 1/2 teaspoons salt
1 cup brown basmati rice, cooked
1/2 cup coarsely chopped roasted peanuts
1/4 cup thinly sliced basil leaves

Heat oil in small skillet over medium heat. Add ginger and garlic; sauté 1 minute then remove. Add the stir fry vegetables, then the next six ingredients. Stir fry until heated through and the sauce thickens. Stir in the basil, season with salt and pepper, then serve over rice and top with the peanuts. 

Links

Related Posts Plugin for WordPress, Blogger...